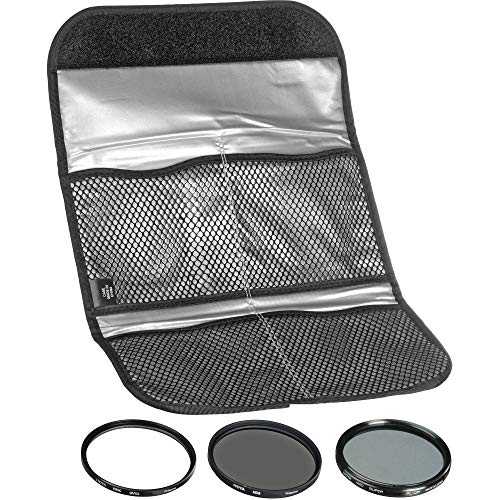
Filters for Digital Cameras
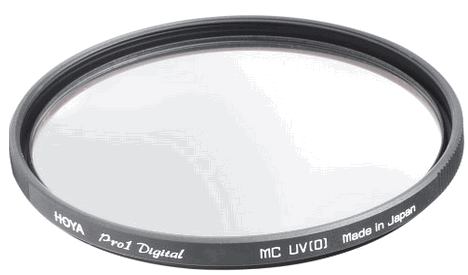
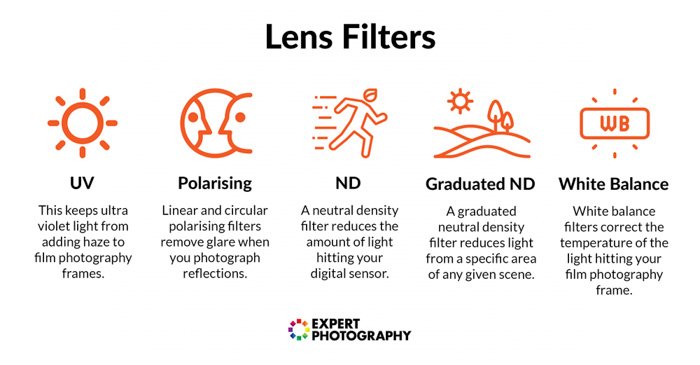
UV Filter
We can’t see UV light, it’s invisible to us. But then, why would we want a UV lens filter? It’s because our cameras can see what our eyes can’t, including UV light. This UV light often appears as a haze, which we really don’t want. In actuality, this is a problem that affects film shooters, and rarely digital shooters. Digital sensors are much less sensitive to UV light. Why still use one? Well, I never take mine off the camera. This photography filter will protect the front element of my lens. So, if I accidentally knock it, my lens filter gets damaged, and not my rather expensive lens. If you buy a good enough quality filter kit, you shouldn’t even see the glass. Some people seem to think camera filters reduce the image quality. I don’t see a problem at all. If you have an expensive, professional lens, like telephoto lenses or a high end wide-angle lenses, which you would like protected – use a UV lens filter. For safety, there are no better DSLR lens filters out there. The filter I use is the Hoya 58mm DMC PRO1 Digital Multi-Coated UV (Ultra Violet) Filter. Keep in mind though, that poor quality UV filters are a common cause of lens flare.
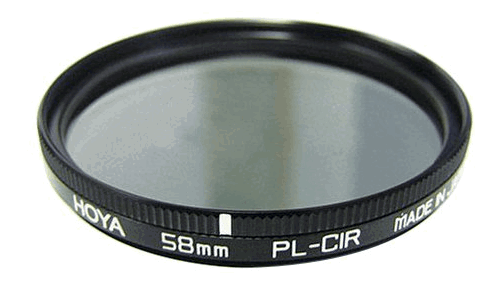
Polarizing Filter
Polarizing filters are really useful, because they reduce glare, and improve the saturation of photos. The effect created by a polarising filter is one of the only effects that can’t be replicated in post-production so it’s important that you own one. I would say that most people who use a DSLR, should buy a polarizing filter. There are two types of polarising lens filters; linear and circular. Linear are traditionally used in film photography, whereas circular is used in digital as they’re designed to not confuse the camera’s autofocus. When you attach the circular filter to the end of your lens, you’ll find that you can still rotate the filter. This changes the direction that the light is polarised. When shooting in direct sunlight, you’ll often find that your images come out harsh and feel overexposed. Think of it as being in the sun with no sunglasses on, it’s hard to see. Polarisers work by only allowing light from a certain direction, which removes the glare from photos. Of course, there’s more to it than that, read more about them here. This is the filter I use: Hoya 58mm (G SERIES) Circular Polarizer PL CIR Filter
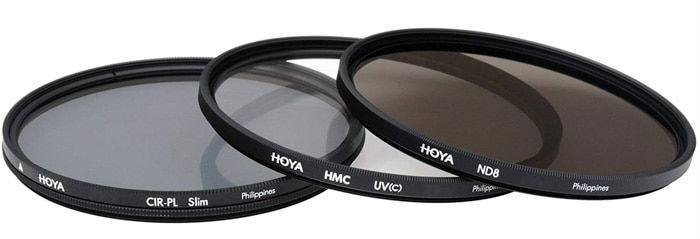
Neutral Density (ND) Filter
Neutral density filters are used primarily to decrease the shutter speed. The way they work is to reduce the amount of light entering the lens at once, which means that if you want to correctly expose, you need a longer shutter speed. Why would you want this? Well, sometimes it’s nice to capture movement in your photos, but there’s too much light and the shutter speed is too fast, even with a narrow aperture. This is where the ND filter comes in. It reduces the amount of light hitting the sensor. This allows you to decrease your shutter speed, without ruining the exposure. You might also want to capture no movement at all. This can be done when you take a really long exposure, for a few minutes with people passing through the scene. The result is a photo devoid of any people. If you’re a landscape photographer, I would thoroughly recommend one of these. They come in different values, depending on the amount of light you would like to block out. This is the filter I use: Hoya 77mm HMC ND8 Multi-Coated Neutral Density Filter
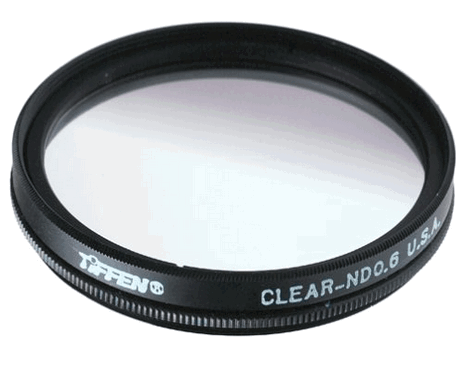
Graduated ND Filter
This is the same as above, only the ND filter is only on one section of the filter. This will help you to evenly expose your photos. Imagine you’re taking a photo of a landscape, and the sun is in the background; you’re going to encounter a problem. The sky becomes overexposed, and the foreground becomes underexposed. Rather than defaulting to HDR, you can use a graduated filter, which will darken the sky, and leave the foreground as it is. This will result in a much more even exposure. This is the filter I use: Tiffen 72mm Color Graduated Neutral Density 0.6 Filter
White Balance Filters (Warming/Cooling)
These lens filters will make your photos look warmer and colder, effectively changing the white balance. They’re basically out of date now, as we can change our white balance as we please. An FLD (Fluorescent Lighting Daylight) filter is a good example here. This filter type allows the camera to photograph under fluorescent lighting. This is because it gives natural light colors when under poor conditions.
How to Choose a Filter
When it comes to camera filters, you can spend a little or you can spend a lot. If you want quality, you have to pay for it. I’m of the opinion that you need to invest in the right areas of your gear. Lenses and filters are definitely where you should be investing. Go for a good name-brand filter, such as Hoya, and buy the best you can afford. Check the diameter of your lens first, to make sure you order the right size. Some kit lenses are usually 52-58mm in diameter, mine is 72-77mm depending on the lens. The wider the diameter, the more expensive the filter.
Conclusion
Buy a UV filter. Buy a polarizing filter if you shoot outdoors in the sun a lot. If you like shooting landscapes, an ND filter or graduated neutral density filters can be really useful. If you’re feeling creative, throw some color filters in your filter kit. Fitted to the front of a lens, these filters will definitely improve your digital photography. You should also check out our article on why you should be using a lens hood. And watch this video before you go.
title: “The Ultimate Guide To Lens Filters For Digital Cameras In 2023” ShowToc: true date: “2023-01-19” author: “Pierre Clow”
Filters for Digital Cameras
UV Filter
We can’t see UV light, it’s invisible to us. But then, why would we want a UV lens filter? It’s because our cameras can see what our eyes can’t, including UV light. This UV light often appears as a haze, which we really don’t want. In actuality, this is a problem that affects film shooters, and rarely digital shooters. Digital sensors are much less sensitive to UV light. Why still use one? Well, I never take mine off the camera. This photography filter will protect the front element of my lens. So, if I accidentally knock it, my lens filter gets damaged, and not my rather expensive lens. If you buy a good enough quality filter kit, you shouldn’t even see the glass. Some people seem to think camera filters reduce the image quality. I don’t see a problem at all. If you have an expensive, professional lens, like telephoto lenses or a high end wide-angle lenses, which you would like protected – use a UV lens filter. For safety, there are no better DSLR lens filters out there. The filter I use is the Hoya 58mm DMC PRO1 Digital Multi-Coated UV (Ultra Violet) Filter. Keep in mind though, that poor quality UV filters are a common cause of lens flare.
Polarizing Filter
Polarizing filters are really useful, because they reduce glare, and improve the saturation of photos. The effect created by a polarising filter is one of the only effects that can’t be replicated in post-production so it’s important that you own one. I would say that most people who use a DSLR, should buy a polarizing filter. There are two types of polarising lens filters; linear and circular. Linear are traditionally used in film photography, whereas circular is used in digital as they’re designed to not confuse the camera’s autofocus. When you attach the circular filter to the end of your lens, you’ll find that you can still rotate the filter. This changes the direction that the light is polarised. When shooting in direct sunlight, you’ll often find that your images come out harsh and feel overexposed. Think of it as being in the sun with no sunglasses on, it’s hard to see. Polarisers work by only allowing light from a certain direction, which removes the glare from photos. Of course, there’s more to it than that, read more about them here. This is the filter I use: Hoya 58mm (G SERIES) Circular Polarizer PL CIR Filter
Neutral Density (ND) Filter
Neutral density filters are used primarily to decrease the shutter speed. The way they work is to reduce the amount of light entering the lens at once, which means that if you want to correctly expose, you need a longer shutter speed. Why would you want this? Well, sometimes it’s nice to capture movement in your photos, but there’s too much light and the shutter speed is too fast, even with a narrow aperture. This is where the ND filter comes in. It reduces the amount of light hitting the sensor. This allows you to decrease your shutter speed, without ruining the exposure. You might also want to capture no movement at all. This can be done when you take a really long exposure, for a few minutes with people passing through the scene. The result is a photo devoid of any people. If you’re a landscape photographer, I would thoroughly recommend one of these. They come in different values, depending on the amount of light you would like to block out. This is the filter I use: Hoya 77mm HMC ND8 Multi-Coated Neutral Density Filter
Graduated ND Filter
This is the same as above, only the ND filter is only on one section of the filter. This will help you to evenly expose your photos. Imagine you’re taking a photo of a landscape, and the sun is in the background; you’re going to encounter a problem. The sky becomes overexposed, and the foreground becomes underexposed. Rather than defaulting to HDR, you can use a graduated filter, which will darken the sky, and leave the foreground as it is. This will result in a much more even exposure. This is the filter I use: Tiffen 72mm Color Graduated Neutral Density 0.6 Filter
White Balance Filters (Warming/Cooling)
These lens filters will make your photos look warmer and colder, effectively changing the white balance. They’re basically out of date now, as we can change our white balance as we please. An FLD (Fluorescent Lighting Daylight) filter is a good example here. This filter type allows the camera to photograph under fluorescent lighting. This is because it gives natural light colors when under poor conditions.
How to Choose a Filter
When it comes to camera filters, you can spend a little or you can spend a lot. If you want quality, you have to pay for it. I’m of the opinion that you need to invest in the right areas of your gear. Lenses and filters are definitely where you should be investing. Go for a good name-brand filter, such as Hoya, and buy the best you can afford. Check the diameter of your lens first, to make sure you order the right size. Some kit lenses are usually 52-58mm in diameter, mine is 72-77mm depending on the lens. The wider the diameter, the more expensive the filter.
Conclusion
Buy a UV filter. Buy a polarizing filter if you shoot outdoors in the sun a lot. If you like shooting landscapes, an ND filter or graduated neutral density filters can be really useful. If you’re feeling creative, throw some color filters in your filter kit. Fitted to the front of a lens, these filters will definitely improve your digital photography. You should also check out our article on why you should be using a lens hood. And watch this video before you go.
