Lightroom Noise Reduction: What Is Noise in Photography?
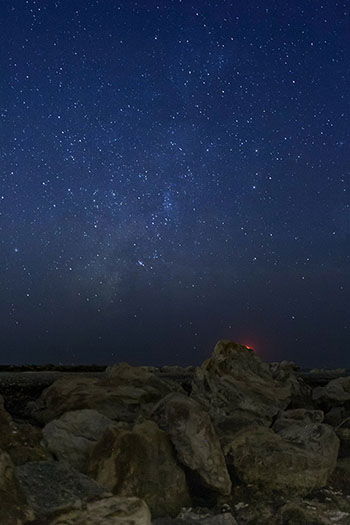
Digital noise in photography refers to the visual distortion you see in images. It’s usually discolored pixels. These can be the result of available light and camera sensor. But also the camera’s sensitivity (ISO) setting. There’s two things you need to understand about noise in your photography. First, it’s a very common issue. You’ll need to learn how to correct it, both in-camera and during post-production. Second, it’s almost impossible to avoid it completely in some situations. This is something you’ll have to live with. The most common culprit of digital noise is the lack of available light. Low-light shooting will almost always result in noise. You’ll have to reduce this in Photoshop, Lightroom or other digital imaging software.
Types of Noise
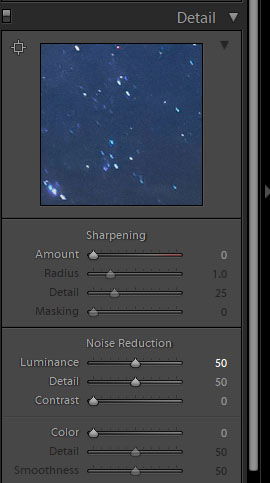
Digital noise can appear in one of two types; color noise, and luminance noise. Color noise is most common in solid dark or light areas of an image. It is composed of color variances of pixels that are incorrect in these solid areas. And it appears as colored flecks. These contrast against solid colors. This makes them more unsightly than luminance noise, and usually easier to identify. Luminance noise doesn’t feature these discolored pixels. It is the result of how variances in light effect the camera sensor. These cause extra “hot” pixels to show, and become visible with a grainy appearance. Lightroom has separate controls that allow you to isolate the noise type you’re dealing with. You can then reduce it without affecting other aspects of your photo.
Noise Reduction in Lightroom
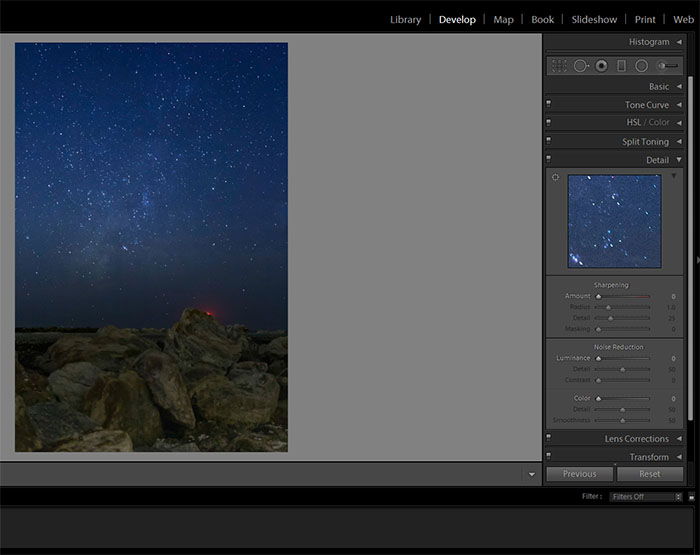
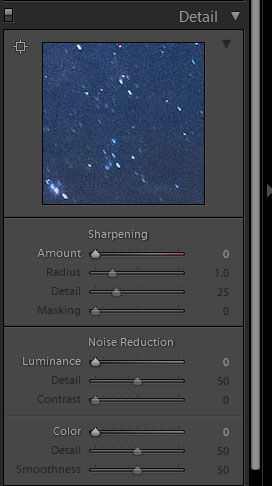
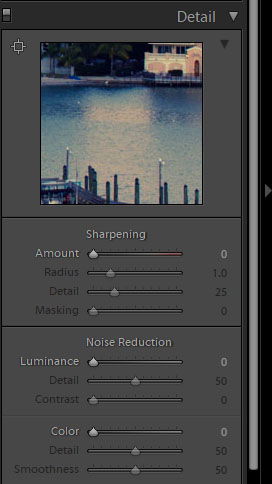
Lightroom’s interface consists of several modules. These appear as tabs near the top of the window. The module we’re interested in is the Develop module. This section contains all the controls needed to edit an image. It includes adjustment sliders for exposure, color, and controls for cropping. You’ll find several subsections in the Develop module, on the right side of the interface. These break the controls up into similar groups. They include basic exposure adjustments, lens correction options, and color toning sliders. The section we’re interested in is the Detail panel. If this panel isn’t already activated, you can click the triangle to the right of the panel title to expand it. The Detail panel houses controls for both sharpening and noise reduction. As we discussed earlier, there are two types of noise. Lightroom presents you with controls to address each of these types.
Fixing Luminance Noise in Lightroom
To remove luminance noise, you’ll use the first three sliders in the noise reduction section. This is the type of noise that is similar to grain. The first slider, Luminance, determines how much noise reduction is applied to the image. As with all adjustments in Lightroom, you want to start off with smaller adjustments. See what effect they have on your image, and then add more as needed. Noise adjustments tend to remove detail and add smoothness. Keep in mind that moderation is key. The next slider, Detail, allows you to keep some of the detail. This is detail you lose by increasing the noise reduction effect. Pushing this slider too high can remove some of the noise reduction you applied earlier. Keep an eye out for that. The last slider you’ll adjust here is the Contrast control. This replaces some of the lost contrast. As with the previous adjustments, use this sparingly. Apply enough to bring some detail back but make sure it doesn’t affect the noise reduction. In some versions, including Lightroom CC, the slider panel is simplified. It offers a Noise Reduction control, without additional detail or contrast sliders. This is the same as the luminance slider in the desktop version of the software.
Removing Color Noise in Lightroom
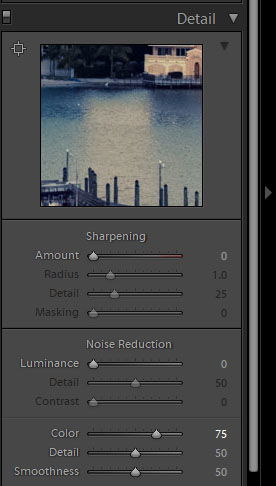
The controls for reducing color noise are almost exactly the same here. The Color slider controls the amount of noise reduction you apply. The off-colored flecks from color noise are easy to reduce with this adjustment. The Detail slider adjusts how much detail you can recover after applying noise reduction. This is exactly like the luminance noise controls. The color noise reduction tools also provide a Smoothness slider. This allows you to increase or decrease the appearance of smoothness in the image. Remember, noise reduction often introduces more smoothness into a photo. This will remove some level of detail. As with luminance noise, the slider panel here is simplified a bit. It offers just a Color Noise Reduction control. There are no additional detail or smoothness sliders.
Minimising Noise In-Camera
Now you know how to minimise noise in post-production. But is there anything you can do to minimise in-camera noise?
Use a Low ISO Setting
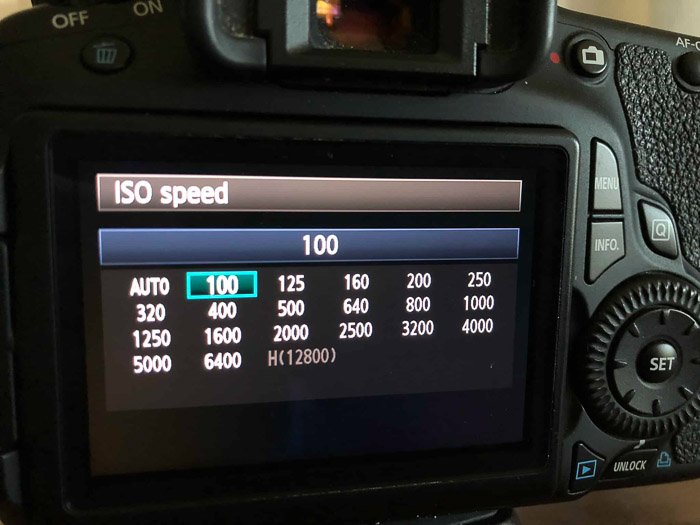
The ISO setting in digital cameras affects the sensitivity of the sensor in collecting light. Raising the ISO setting to a higher rating increases the sensitivity of the sensor. This means it collects more light. It also introduces digital noise into the photograph. Photographers use higher ISO settings in many low-light situations. Night photography, astrophotography, and photos during or after the blue hour are some examples. Without a high ISO, there won’t be enough light for a proper exposure. So you already know you’ll need to do some correction in post-production to remove noise. The simple rule to remember here is to always use the lowest ISO setting possible. Start with a setting of 100. Only increase the ISO if you have no other way of introducing more light into the camera. You can try opening the aperture further (lower f/stop) or slowing the shutter speed instead. Daylight or plenty of supplemental light usually allow you to shoot a much lower ISO setting. This means you’ll avoid introducing noise into the final image.
Use the In-Camera Noise Reduction (But Don’t)
Most modern digital cameras include a noise reduction setting. This is for both high ISO and long exposure shooting situations. So why wouldn’t we set these up and forget about the noise problem? The effectiveness of these features varies from camera to camera. You can set the degree to which the effect is applied. But you don’t have the fine control that external software will give you. Noise reduction in Photoshop or Lightroom is much more effective. It’s also easier to apply and remove. This renders in-camera reduction almost useless. And finally, only shoot in RAW format.
Conclusion
I hope I’ve shed some light on keeping your photos noise-free and looking great! You can use third-party software solutions to handle noise reduction. But if you’re already using Lightroom, you don’t need to. The software provides an effective method of reducing noise. And you don’t have to learn to navigate a new system. Have some editing success stories involving Lightroom? Join the discussion below and share with us!

