Incorrect colors can affect both the mood and quality of the picture. Today I will show you how to use color correction in Lightroom. To follow this Lightroom color correction tutorial, you will need Adobe Lightroom software and an image in RAW format. It is vital to have the image files in RAW format and not JPEG. JPEG files do not take color adjustments well and the quality of the images will be compromised.
How to Use Color Correction Using the Lightroom Basic Panel Tools
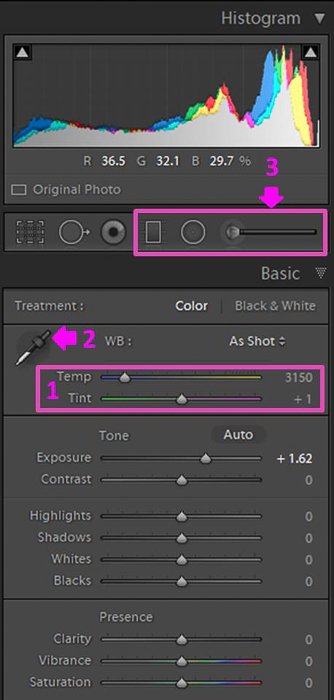
Lightroom has many tools for photo color correction. You can access some of them from the Basic panel in the Develop module. To read more about these tools and how to use them, check my article “How To Adjust White Balance in Lightroom“:
Temp and Tint slide bars. These tools are intuitive but be careful not to move the slides too much as you might overdo the effect. Dropper tool. Select the tool and click on an area to define it as a neutral color reference. Lightroom will adjust the rest of the image to the chosen color. Brush and filters. These tools are excellent for color correction in specific areas.
How to Color Correct Photos Using the Color Tone Curves
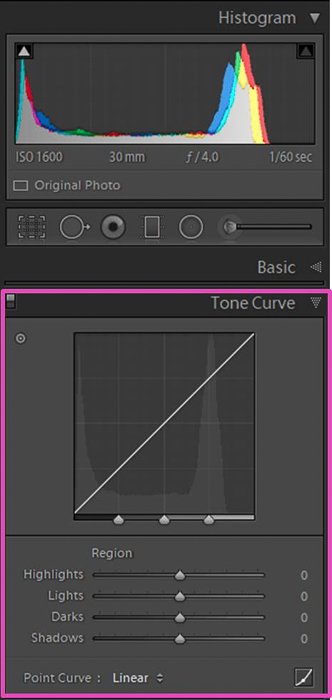
The Color Curves are part of the Tone Curve Panel at the Develop module. In general, Tone Curves allows you to adjust the full range of tones in your image. When you first open the panel, you will find the RGB channel selected. This Tone curve allows you to make simple changes to the tones.
To make color correction, you need to select a color to modify. To do so, click on the icon in the bottom right corner.
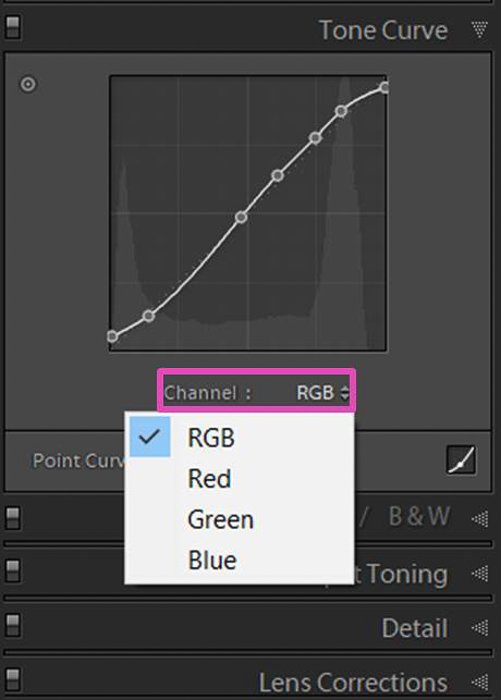
Then, click the arrows next to RGB, to the right of “Channel” at the bottom of the curve. This action will open a drop-down menu where you can select the color (red, green or blue) you want to correct.
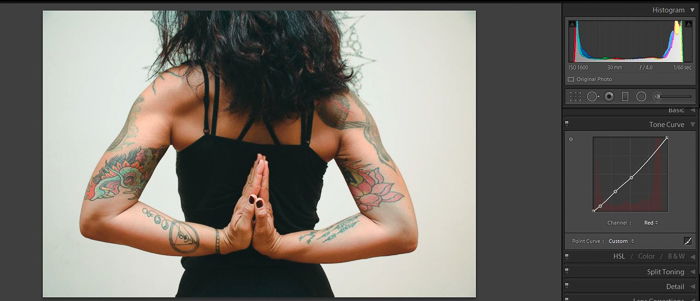
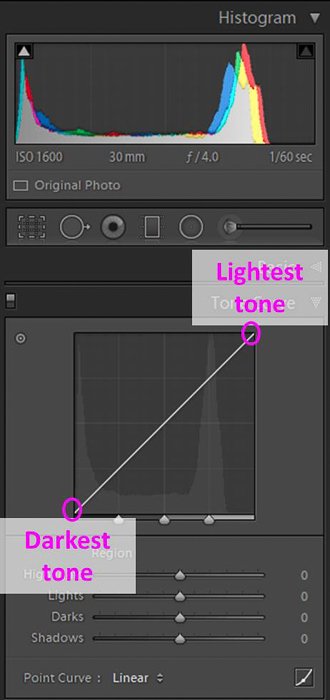
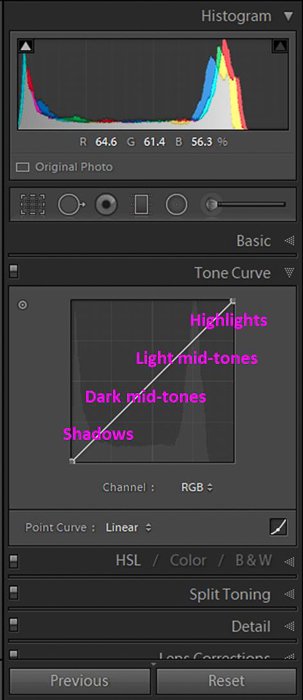
Working with the curve is quite intuitive. In the figures below, you can see the Tone Curve of the RGB channel. The concepts are the same for the single Color Curves (Red, Green and Blue). In the non-edited image, the curve is a diagonal line that represents the tones in the entire picture. The tones are arranged darkest to lightest from the bottom left to the upper right. Tone curves can be divided into areas according to the Tones: shadows, dark and light mid-tones and highlights To adjust the brightness of different areas, drag the diagonal line up or down. If you move the line above its initial position, you make it brighter. If you move it below, it will become darker.
Choose One out of Three Ways to Adjust a Tone Curve
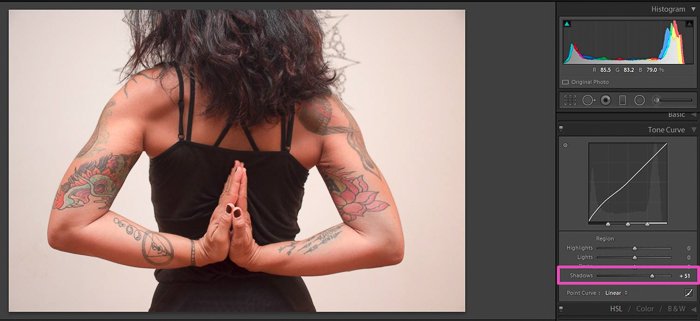
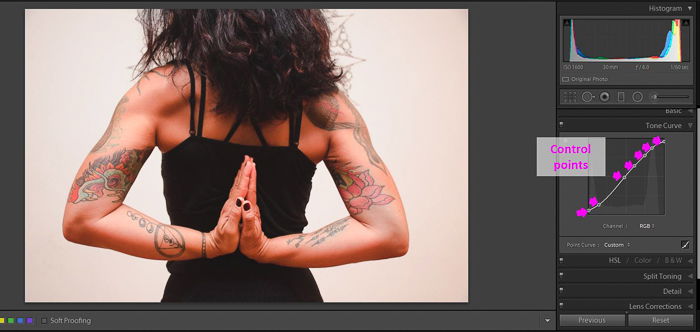
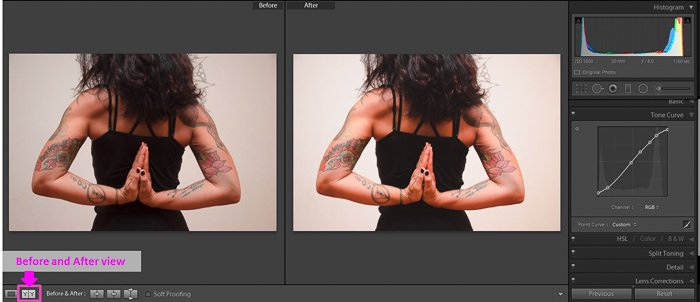
You can edit a tone curve in different ways. The easiest is using the sliders. Keep in mind that it allows only simple adjustments. As an example, I will start by editing the RGB Tone Curve. If you don’t see the sliders, click on the icon in the bottom right corner until they appear. By clicking again, sliders will disappear. Hover with the mouse over the markers of the sliders. Lightroom will show you the area affected by your edits in light grey. Move the slider towards the left to brighten the selected tones; in this case, the Shadows. Move towards the right to darken them. To have more control over the tone curve, you should create control points. You can then change the different areas of the image by dragging them up or down. To set a point, make sure to click on the bottom right corner icon until you see the sliders disappear. Then click on the curve to establish a control point and drag it up or down. You can place several control points along the curve. To remove a control point, drag it towards the right or the left, and it will disappear. Click in the Before/After view icon to compare the original image with the final edit. As you can see, editing the RGB Curve I managed to improve the picture, but colors were not corrected. To correct them, you need to use one of the Color Curves.
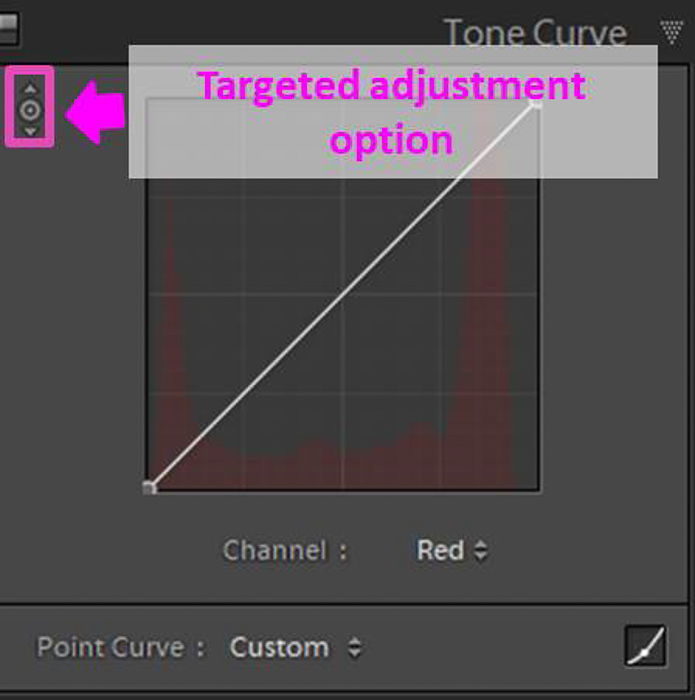
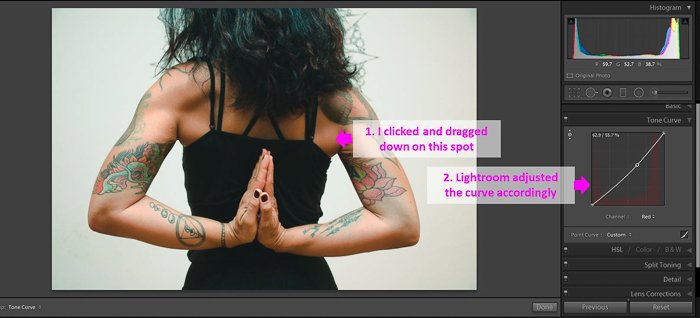
There is a third way to edit a curve: using the Targeted Adjustment option. Select it and click and drag on the point of your image you want to brighten or darken. Lightroom will select the tones to change and adjust the curve.
Select the Color Tone Curves for Color Correction
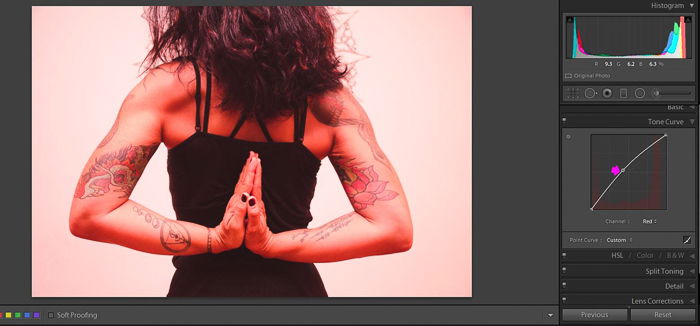
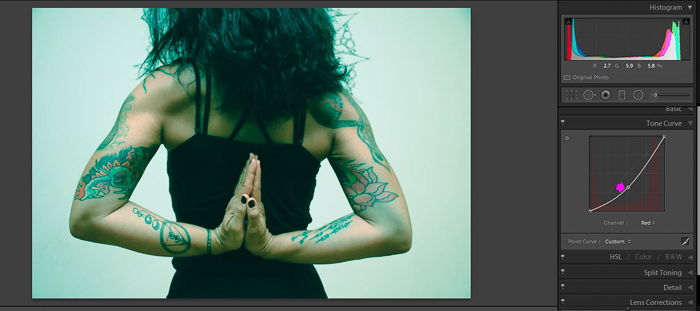
When you use the Color Curves, you correct a specific color: red, green or blue. Remember that when you pull down one color, its opposite will go up. Red is the opposite color of cyan. Green is the opposite of Magenta and Blue is the opposite of yellow. Color Curves are a great tool to correct color casts from your image and to correct skin tones. It is quite common to have redness in the skin. To fix it, select the targeted adjustment option, click on a point in the skin that has too much red and drag down.
Avoid Unnatural Editing by Making Subtle Changes in the Color Curves
Tone Curves are powerful tools, and small changes produce strong effects in the look of the photo. I recommend you to start with subtle adjustments to avoid unnatural looking edits. Invest some time playing around with the color curve and be patient with the results. This practice will make your editing flow improve a lot.
Use the Camera Calibration Panel for Deep Color Correction
Cameras from different manufacturers use different basic colors. For example, one manufacturer chooses a specific type of blue as its reference Blue. Another manufacturer can choose a darker shade of blue instead. If you use different cameras to take photos of the same scene, they could have different colors. Lightroom has a Camera Calibration panel where you can change your original camera color settings. Keep in mind that these changes affect the definition of the basic colors (red, green, blue) of the pixels. Any changes in this panel will have a substantial effect on the colors of your image. I don’t recommend significant changes, unless you are doing it for creative purposes.
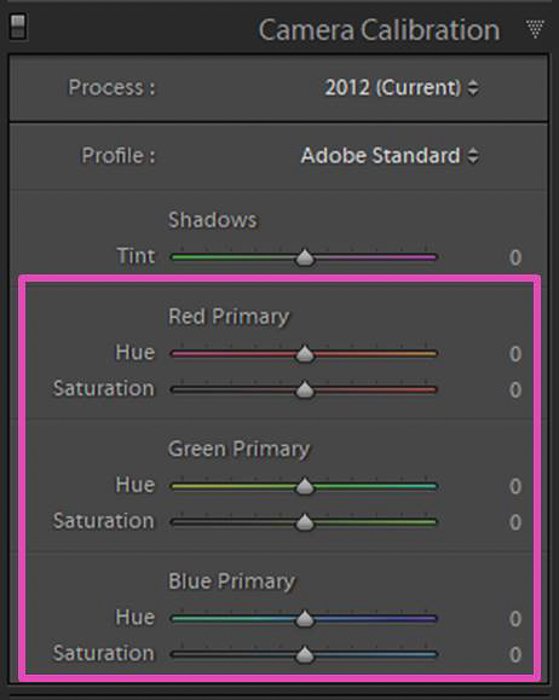
Improve Color Correction Using Sections of the Camera Calibration Panel
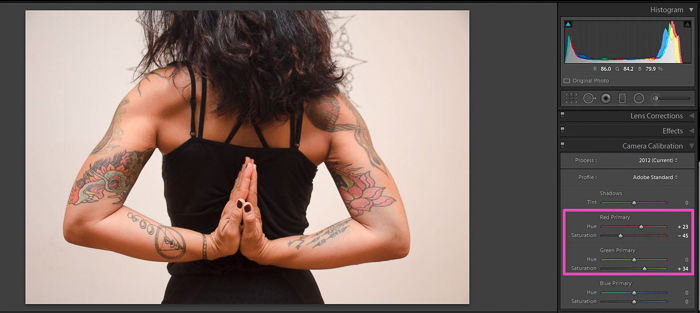
The panel has different sections. The more intuitive ones are the RGB Primaries with their Hue and Saturation sliders. Here you can change the red, green or blue in your image.
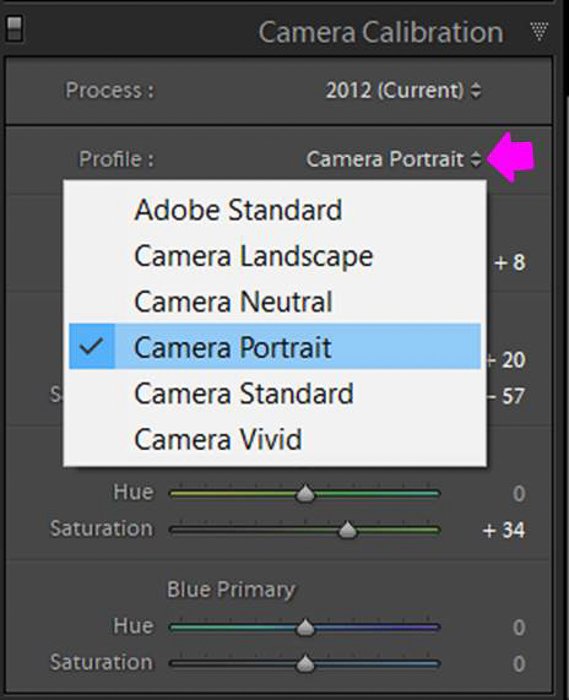
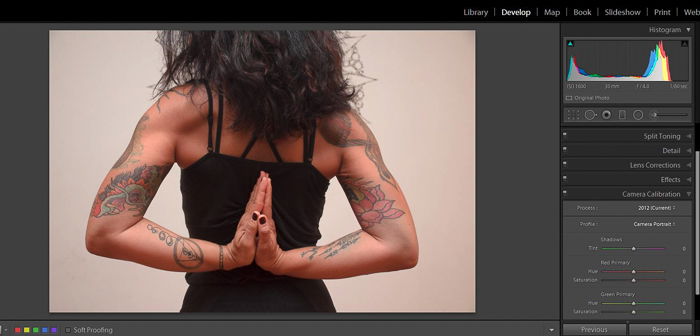
The Shadows slider controls the color tint of shadows, from green to magenta. The Camera profiles option allows you to access the color profiles of your camera. These profiles were set by the camera manufacturer to fit different types of images. They are part of the image’s metadata. The Camera profiles option has a drop-down menu that changes depending on your camera model.
Adobe changed Lightroom’s color definitions over time. In the Process section, you can open a drop-down menu. Here you can switch between the definitions that Adobe made along the years.
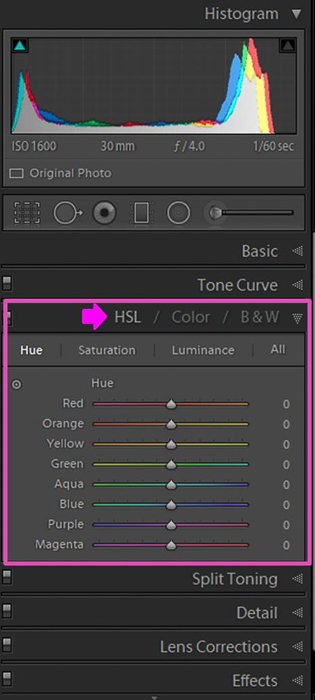
Use the HSL Panel to Correct Individual Colors
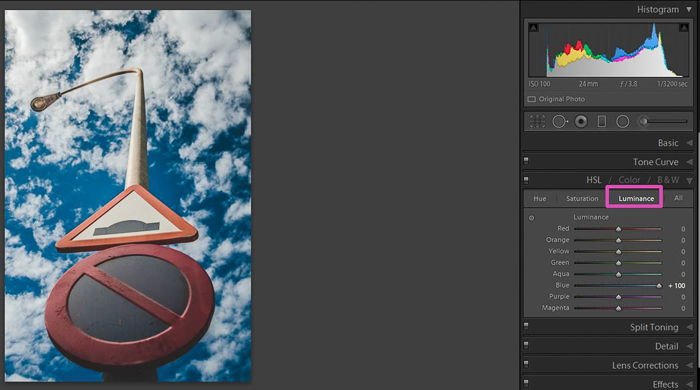
A precise way to color correct your image is using the HSL panel. You can adjust colors independently, without affecting the rest of the picture. HSL stands for Hue (color shade), Saturation (color intensity) and Luminance (color brightness). These are the three factors you can control using this panel for color correction. This panel might be a bit overwhelming at first, but it is quite intuitive thanks to the design of the sliders. Each slider has a preview of the effect it will have on the image.
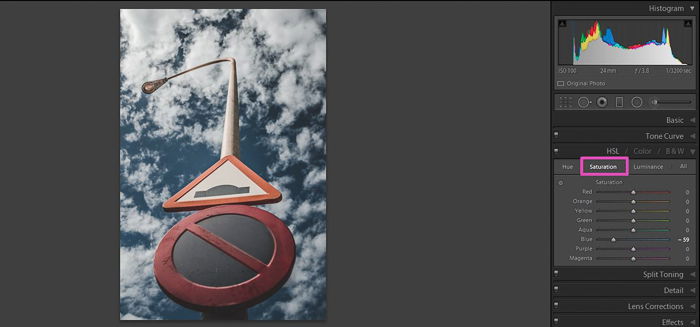
Choose the HSL or Color Display
When you select the HSL panel, you can choose between two displays: HSL or Color. These are two different ways to show the same thing. You can choose one or the other according to your personal preference. The HSL option shows all the colors. The hue, saturation and luminance appear in separate sections. You can also see them all at once if you select All, but then you will need to scroll up and down a lot, searching for the colors.
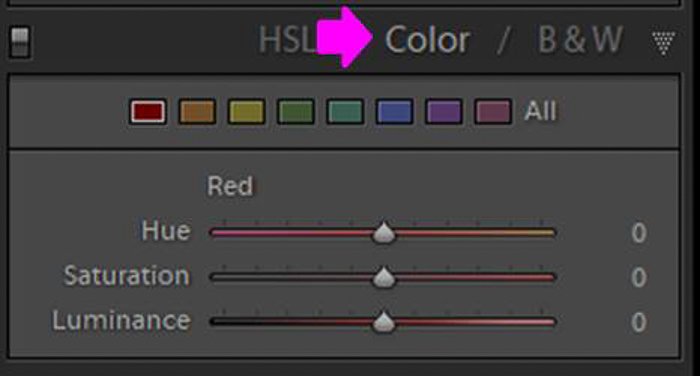
The Color display option will show you the colors one by one.
Correct Specific Colors by Selecting Them in the Panel
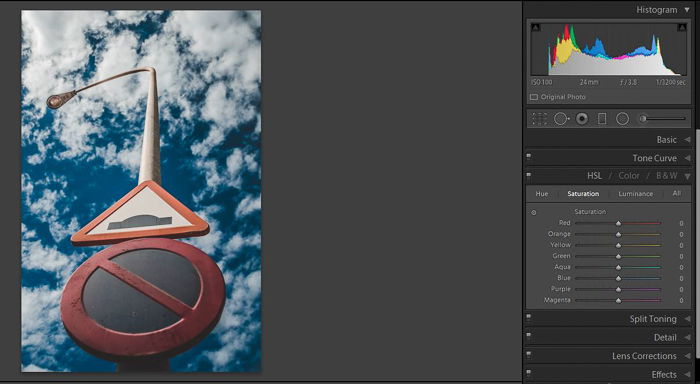
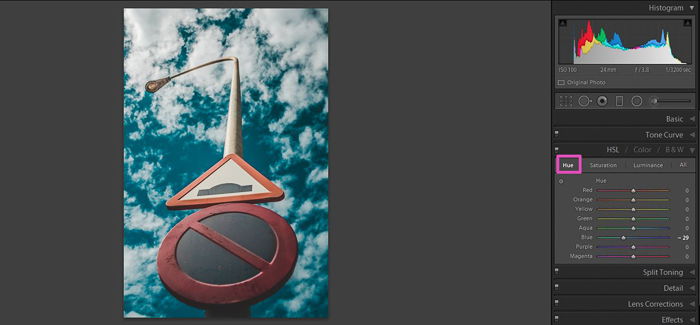
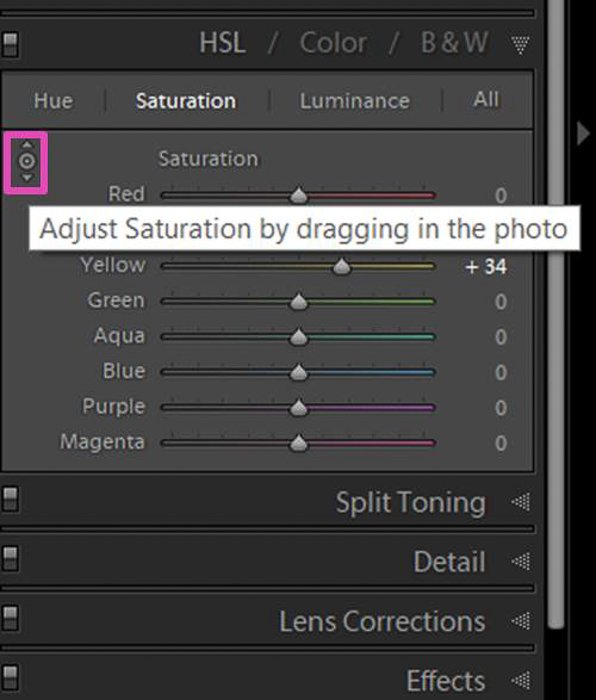
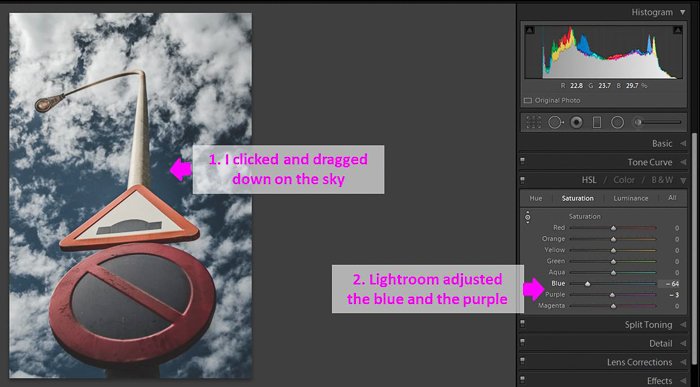
You can select colors in two ways. You can choose a color and move its slider right or left depending on the effect you want to achieve. The Hue sliders correspond with the colors written on the left. Each slider shows you a color gradient (for example from red to orange). What you set on the slider will define the corresponding color. The Saturation and Luminance sliders work similarly to the Hue sliders. Moving the sliders to the right will increase them and moving them to the left will decrease them. The other option is to use the picker tool instead. Click on the little icon at the left upper corner of the panel. Your cursor will change.
Click on your image precisely over the area you want to adjust and scroll up or down. If the spot you selected has a single color, you will see one slider move. If the area has a mixture of colors, you will see their sliders moving all at once while you scroll.
Common Color Correction Questions
How Do I Change Colors in Lightroom?
To change colors of elements in the photo, you need to mark it with the Brush tool. Click on the color selection icon (white rectangle with an x on it) located in the Mask panel under the slide bars. Then select the color you want.
How Do I Correct White Balance in Lightroom?
Lightroom offers several tools to correct white balance. You can use the Dropper tool by clicking and selecting a reference spot. You can also use the Temp and Tint sliders.
What Is Color Correction in Photography?
Color correction is the process of fixing problems in an image by adjusting the colors. Example of image problems are color casts or a wrong white balance. You can correct these colors using editing software like Lightroom or Photoshop.
How Do I Remove a Color Cast in Lightroom?
There are several ways to remove a color cast in Lightroom. In the Basic panel, you can use the Temperature or Tint sliders or select a White Balance preset. Another way is to change individual colors in the HSL panel. You can also use the Color Tone Curves or change the Camera Calibration setting.
Conclusion
Color correcting is a necessary process and Lightroom offers many tools and ways to do it. You can make modifications to the whole photo or modify specific areas or colors. Proper color correction can save a bad picture and turn good photos into great ones. I also recommend experimenting with the tools and using them to create artistic effects in your photography. Check out or post on using Adobe Photoshop color modes or lab color next!

![]()
![]()