Read our step-by-step guide to learn how to create a vignette in Lightroom for any image.
Using Vignette in Lightroom: What is It and Why Should You?
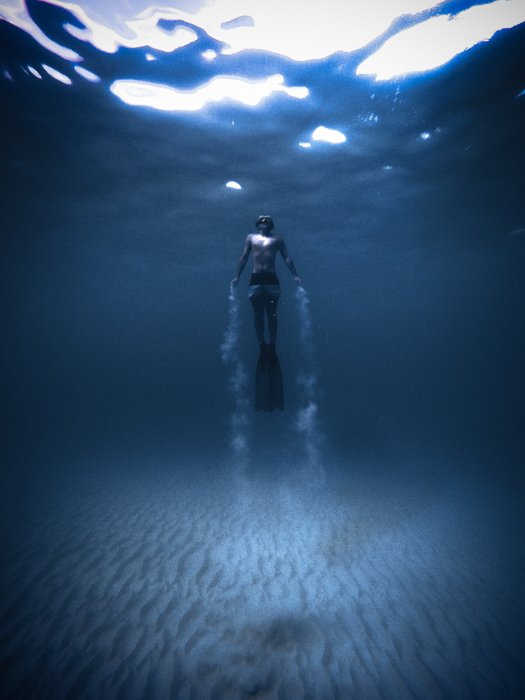
In photography, a vignette is a reduction or increase of the brightness or saturation around the edges of the frame. This technique helps to highlight the center of the image by removing distractions and making the middle pop. Make sure to use this technique sparingly. Over-the-top vignetting can have the opposite effect of what you want to achieve. What should be an artistic look can quickly turn into over-editing. A correctly used vignette serves to empower your images. A darker edge will stop your viewer’s eyes from wandering out unnecessarily. It will help to draw the eyes towards the most important areas of your scene.
Why Use Lightroom to Add a Vignette?
Lightroom is easy to use, making it perfect for adding a vignette to your images. What I like about using this programme is that you can copy and paste the settings and processes. This allows you to use the same technique on multiple images, making the whole process faster. You can learn more about using Lightroom with our Effortless Editing course.
How to Create a Vignette in Lightroom
I will show you three different ways of creating a vignette in Lightroom.
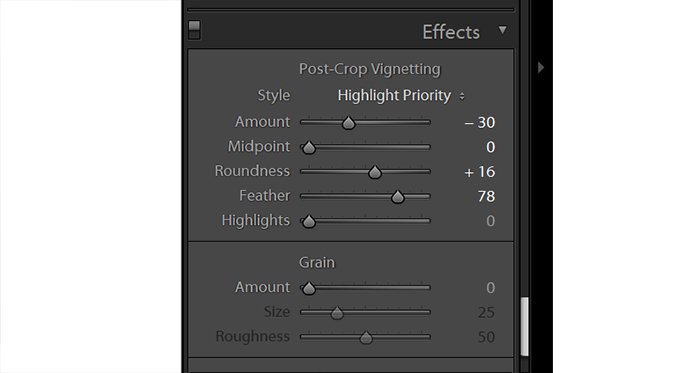
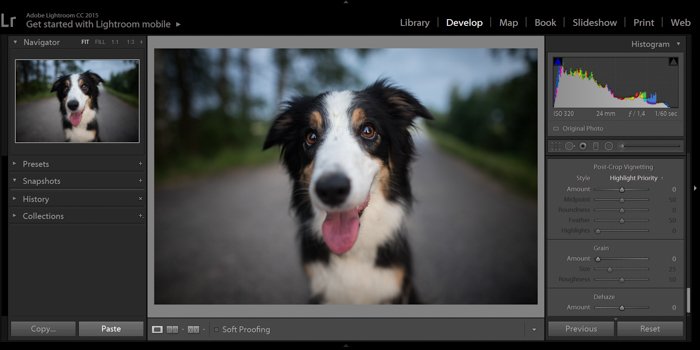
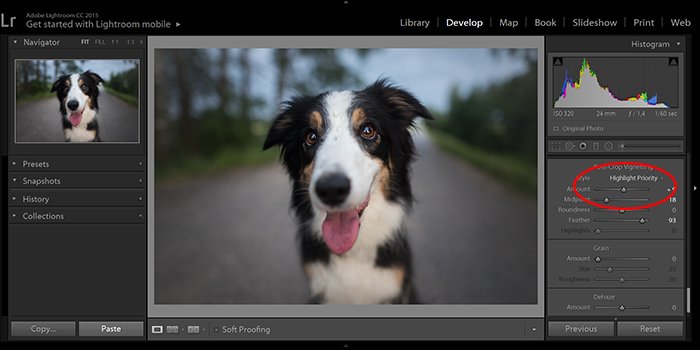
1. Use the Post-Crop Vignette Tool for a Dramatic Result
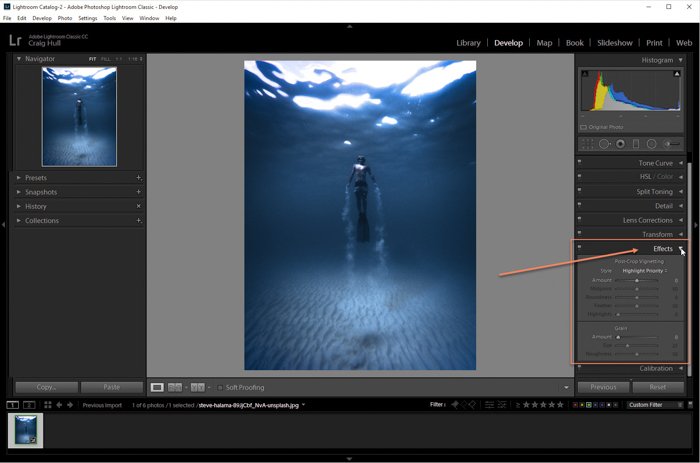
The easiest way to create a vignette is to use the Post-Crop Vignette Tool. Open your image, and head over to the Develop module.
In the right-hand section, you’ll find the Effects panel. Click on it to expand it.
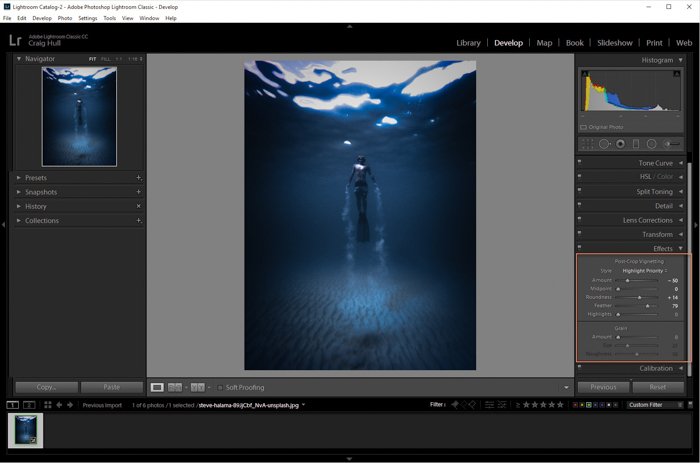
To change whether you are creating a vignette from exposure or saturation, click on Style. Use the Effects panel to change the Midpoint (the center of the vignetting), Roundness (how round or oval the effect is), Feather (how smooth the transition is) and Highlights (how bright the whitest areas are). Play around with these sliders to create the vignette that best compliments your scene.
Here is the final image using the Post-Crop Vignette.
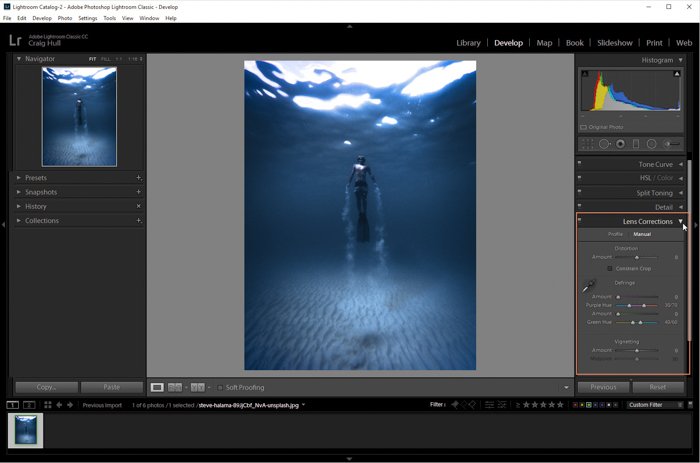
2. Use Lens Corrections for Subtle Changes
One way you can add a vignette to any image is to use the Lens Corrections panel. This is a great way to add a very subtle vignetting. You won’t have much control here, so don’t expect too many sliders or settings. Open your image, and head over to the Develop module. Go to the Lens Corrections panel.
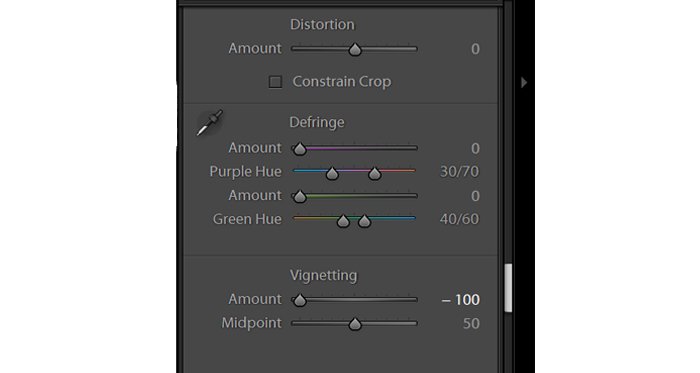
The vignette tool is at the bottom of the panel. To create a dark vignette, move the slider left, to create a light effect, move it to the right. There isn’t much to play around with here, but it will give a basic vignetting to your image.
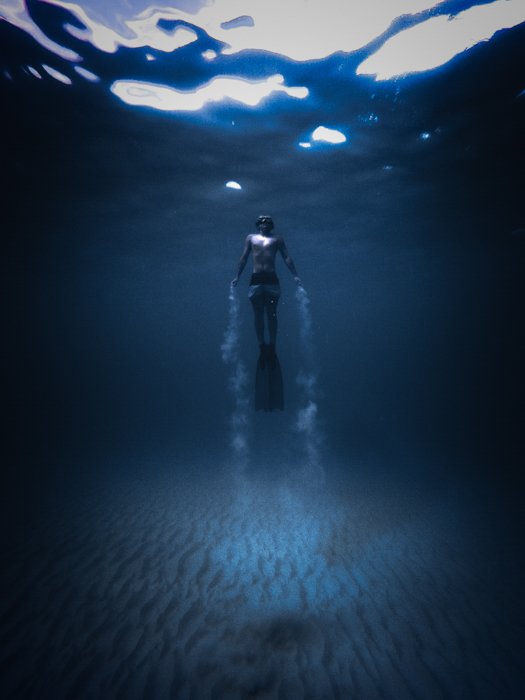
Here is the final image of the Lens Correction vignetting option.
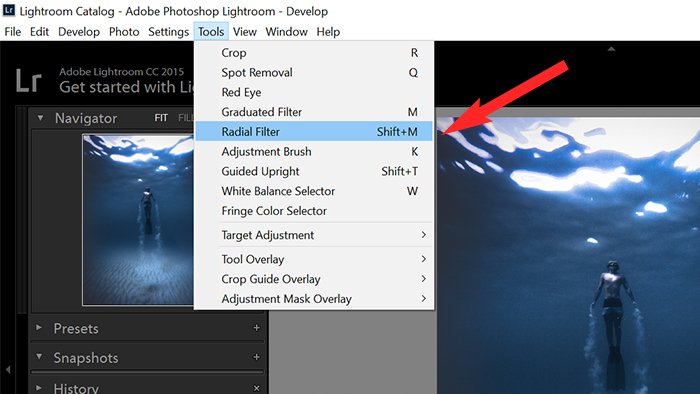
3. Use the Radial Filter for the Most Editing Options
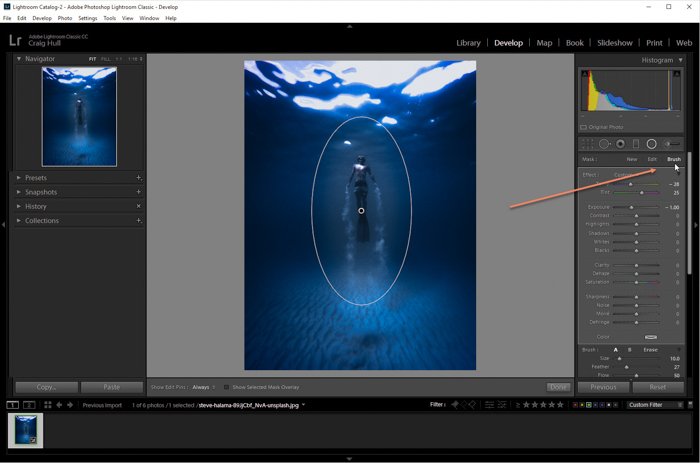
One of the best ways to create a vignette is with the Radial Filter. This option offers you the most amount of manipulation, helping you create the best possible vignette. Open your image, and head over to the Develop module. There are two ways you can create a Radial Filter. You can use the top bar and go to Tools>Radial Filter or Shift + M.
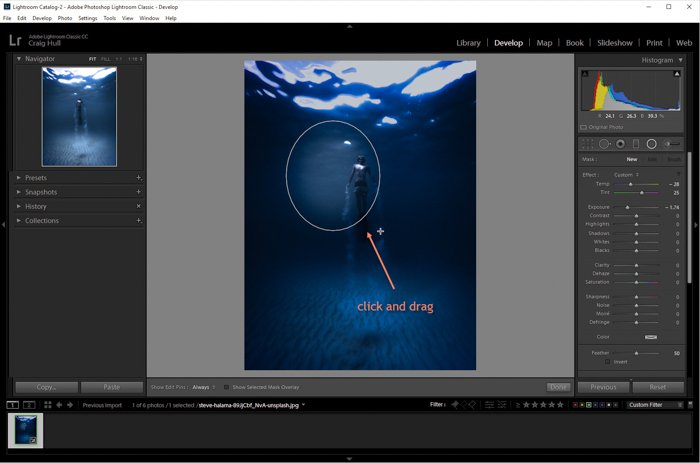
To create the vignette, place a filter over the area where you DON’T want the effect. Click and drag on the image to create the radial filter. You might be used to clicking and dragging like you were drawing a box, starting with a corner. This filter works by dragging from the center of where you want to place it. When you are finished, unclick the mouse. Don’t worry if you didn’t get it exactly correct the first time.
Once you create the filter, you are free to move, widen and lengthen it. You can move it when you see the Hand icon, widen it with the blocks on the sides, or lengthen it with the top and bottom blocks.
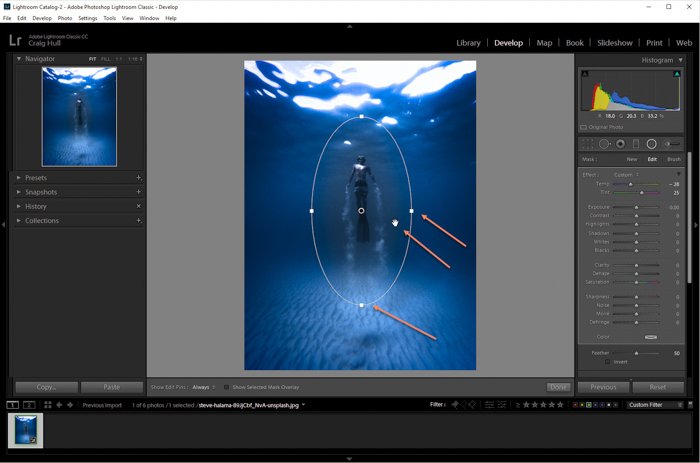
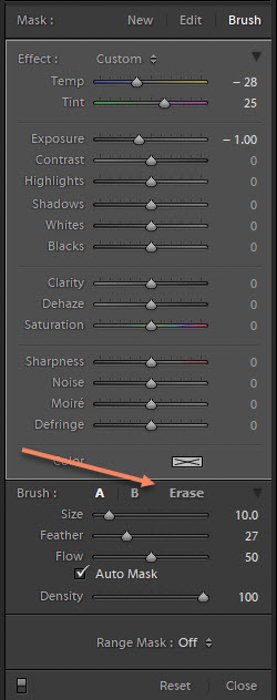
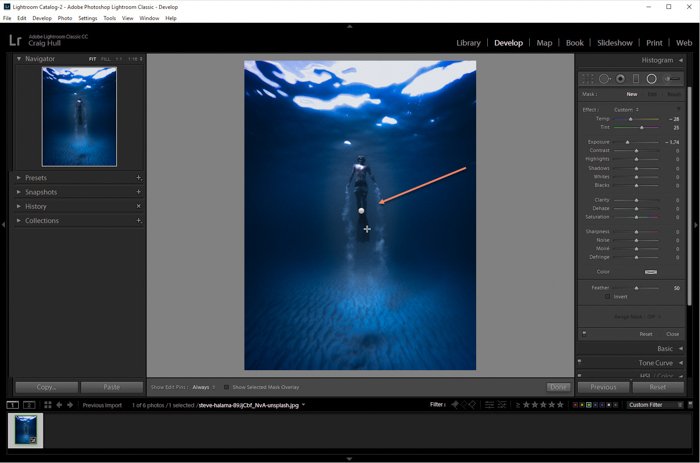
Once you’re happy, move the exposure slider around. Dragging the slider left creates a darker vignette, dragging it right adds exposure. You can use any sliders in the panel to tweak your vignette as you see fit. If you make a mistake or create something you don’t like, you can use the Erase button.
The Brush tool lets you tweak the area inside the filter, whereas the Edit area only lets you play around with the area within the vignette.
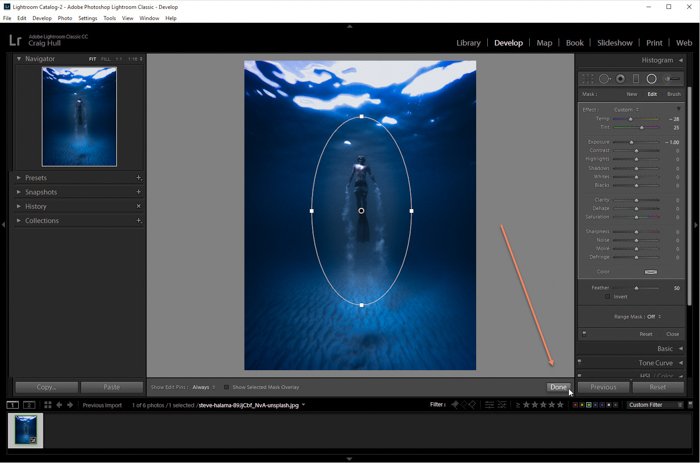
Once you have adjusted the vignette as much as you want, press the Done button to finish. If you need to return to the radial filter to further tweak the vignette effect, head back to the filter. Shift + M or Tools>Radial Filter. Then click on the little button where you first created your radial filter.
Here is the final image.
How to Remove a Vignette in Lightroom
You might have experienced that some lenses automatically darken the corners of your image during shooting. While this might be pleasing on some pictures, other photos may not benefit from it so much.
Luckily, the tools mentioned above can be used not only for adding, but also for removing a vignette. All you need to do is slide the slider right, using any of the methods above. You will see the vignette slowly disappearing.
Conclusion
A vignette has several purposes. You can use it to draw attention to the center of the picture or add an artistic or dramatic look. Lightroom is the easiest tool for achieving this during post-processing. Looking for a good post-processing programme alternative? Check out our full Adobe Bridge review!