Why Horizon Placement is Important
When a frame is divided by a single, dominant line, more often than not this is due to a Horizon. They’re fairly common in outdoor photography, particularly landscapes. If the photo is of nothing particularly interesting, this line can become the dominant part of the photo for the way it separates the frame.
Where to Place the Horizon and Why?
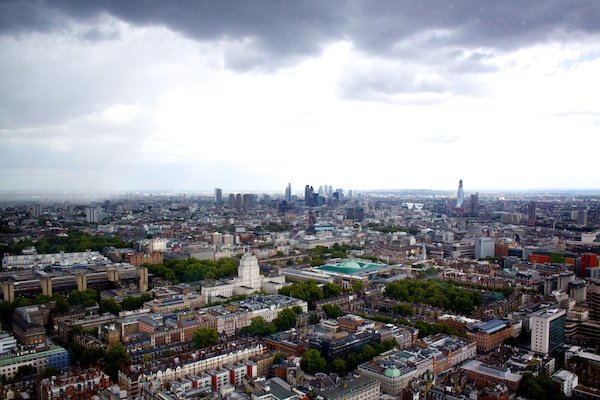
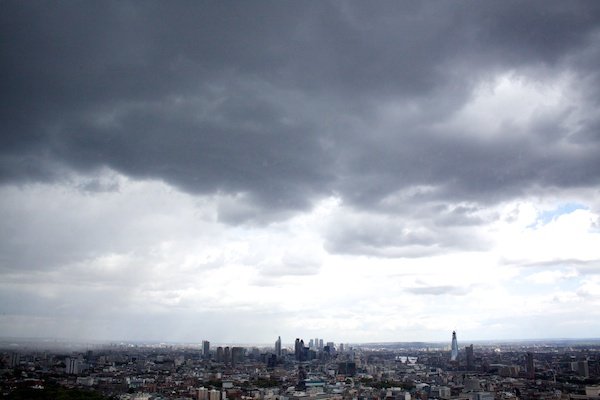
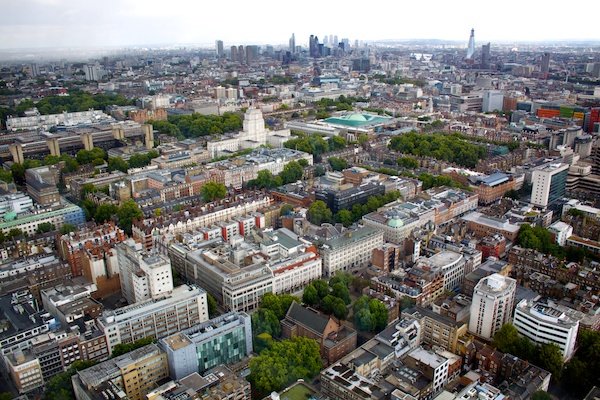
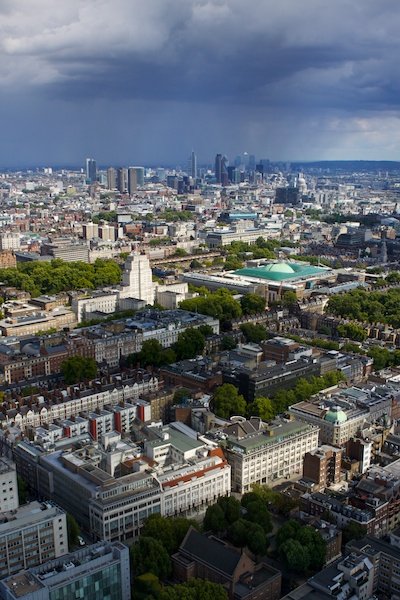
Firstly, I think it’s important to realise where you don’t want to place the line, and that’s directly in the middle of the frame. That’s not to say that you shouldn’t ever it, this just has a tendency to divide the photo in half, creating an uneven photo. The contrast between the two halves makes it look more like two separate photos. Exactly where you place the horizon is completely up to you but it helps to remember that, if a feature of a photo does nothing to improve it, it has no place in the photo to begin with. Here’s a photo where the horizon has divided the frame in two. Notice that it doesn’t really favour either half. If you take the horizon and place it slightly lower in the frame, you regain a feeling of stability which balances out the photo better. You also remove the feeling of division and the whole photo starts to come together as a single image made up of multiple elements, rather than just two photos stuck together. Have a look at the photo below to see what I mean. If you were to decide that the top half of the frame was much more interesting than the bottom, you may want to adjust your composition so that the horizon is a lot lower in the frame. The photo below was taken from a tower in London on a rainy day with emphasis on the sky. The cityscape adds an interesting texture to photo but holds much less visual weight. It serves to make the man made city look small in comparison to the powerful sky and weather. This is one of the many interesting, extra feelings which can be evoked when you consider the importance of different aspects of a photo and adjust your composition accordingly. The photo below was taken directly after the photo above and focuses largely on the ground, rather than the sky. This photo contrasts greatly with the one above because it doesn’t evoke the same feelings, instead focusing more on the color and lines in the city. Your eyes are naturally drawn up the photo from the color of the trees and houses at the bottom of the frame to the sharp and jagged nature of the buildings by the sky at the top. An equally interesting photo but for different reasons, all because of the decisions made over the placement of the horizon. Importantly though, you’ll see that both images are stronger than the original image which cut the photo in half. If you want to include both the sky and the ground but don’t want to cut the photo in half, I recommend changing the orientation to portrait. Again, you’ll probably want to avoid placing the horizon in the middle of the frame but the decision is up to you. I personally feel that the composition in the photo below is stronger than any of the photos above as it includes the most interesting parts of each photo. The weather had changed slightly between photos, meaning that there was less uninteresting sky in the photo. This certainly helped towards finding the perfect balance between sky and ground. It’s all about thinking it through and experimenting with what works for you.
High Horizon
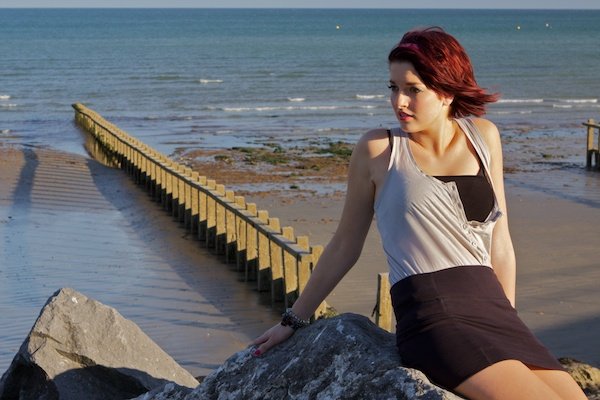
Now that we’ve covered why you want to include a high or a low horizon, let’s have a look at some examples. The high horizon in this photo was an obvious choice as the sky was particularly plain and uninteresting on the evening that I took this photo. Realising this, I made a special effort to include the foreground a little bit more to strengthen my photo. I found these strong, jagged rocks which contrasted nicely with the sky while blending in with the color of the photo. Below is an extreme example of a high horizon – I chose to include it because it focuses the interest onto the subject and foreground below. It makes it look as though the visual weight of the subject forces the camera down, at the same time keeping the photo stable by remaining straight across the top of the frame. There’s a lot going on in the lower half of this photo and the inclusion of the sky would have distracted from this.
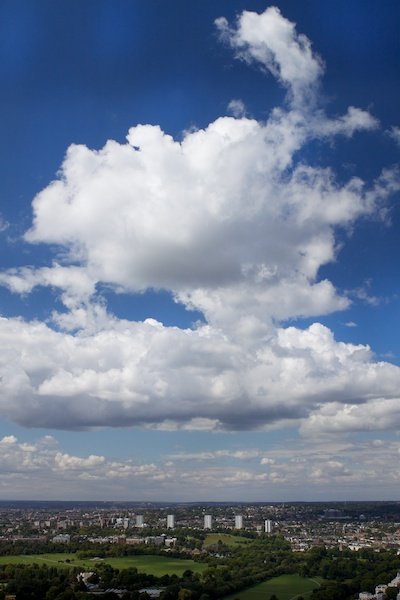
Low Horizon
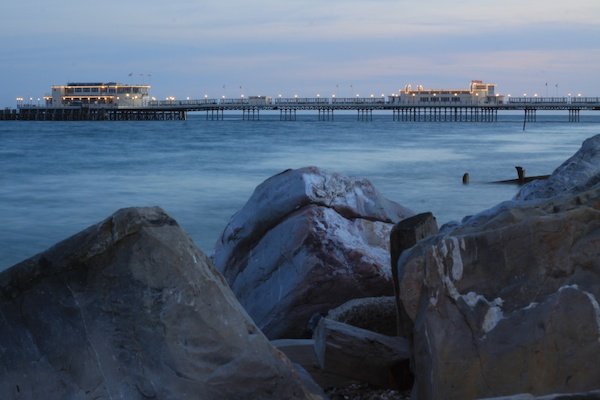
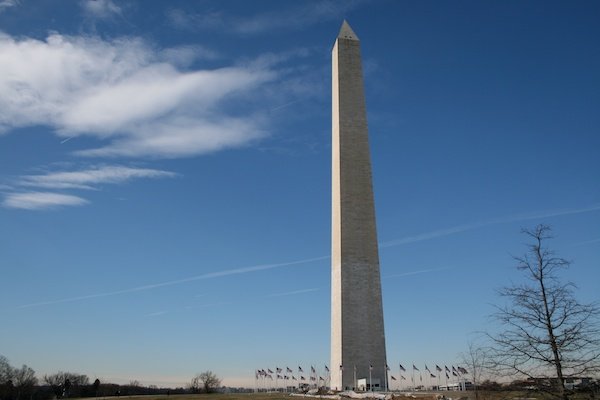
Photos of clouds from below can be pretty boring and rely heavily on being ‘pretty’ for attention. If you raise your angle, the clouds rely more on their shape and form to attract viewers. Because I had a higher vantage point and the shape of the clouds was particularly interesting, I chose to include as much of them as possible, which meant using a lower horizon. I included just enough of the ground to make the color interesting and complimentary to the color of the sky, while focusing most of the viewers attention towards the subject: the clouds. This is an example of a very low horizon. I chose to take the photo this way not because I wanted to emphasis to be on the rather uninteresting sky, but because I wanted to focus on the dominance of the building. With the horizon that low, the feeling of balance is lost which draws your attention towards the bold building standing on top of it. By removing many other potential features from the frame, you focus the attention onto one specific point – the building.