It also has patterns that you can use to create your own fine art. Some of these include poses, expressions, and lighting that will add an elegant touch to your portraits. Before exploring these patterns, let’s understand what makes an outstanding portrait.
Fine Art Portrait Photography: How Portrait Photography Becomes Fine Art
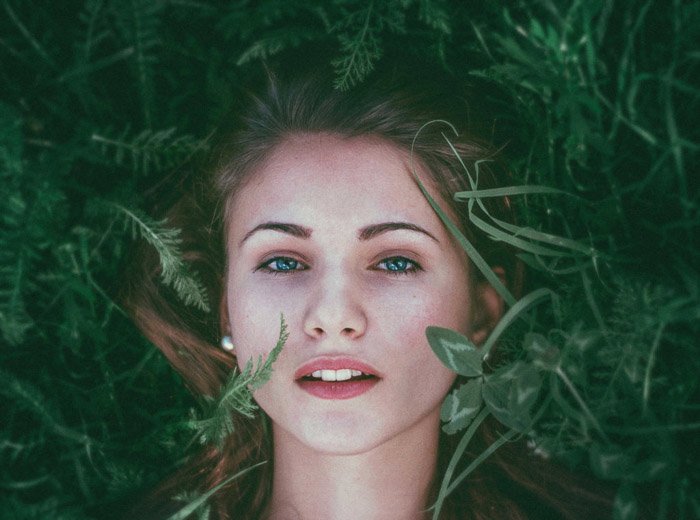
In general, portraits feature at least one person whose face may or may not be shown. Your subject’s appearance can be concealed by makeup, shadows, or an object. Alternatively, their head can be turned or not even included in the frame. Some photographers remove parts of their subjects’ faces (in an editing program, of course!) to put a spotlight on a specific theme, strengthen their editing skills, or dip their toes into surreal portrait photography. There’s a thin, unclear line between portrait and fine art portrait photography. In my opinion, if you want to create a portrait in the fine art genre, you have every right to label it any way you like. If it’s something that could hang in an art gallery, it’s fine art. If you carefully planned your photoshoot and had a very specific concept in mind, your results are fine art. As you can see, there are no boundaries for this genre. There are, however, a few patterns that I’ve noticed in the most popular fine art portraits. Once you familiarise yourself with them, you’ll develop a fine art instinct that will help you find and create the most stunning portraits imaginable. As absurd as this sounds, it works!
Tips To Create Your Own Fine Art Portraits
1. Use Classic Backgrounds to Highlight the Subject
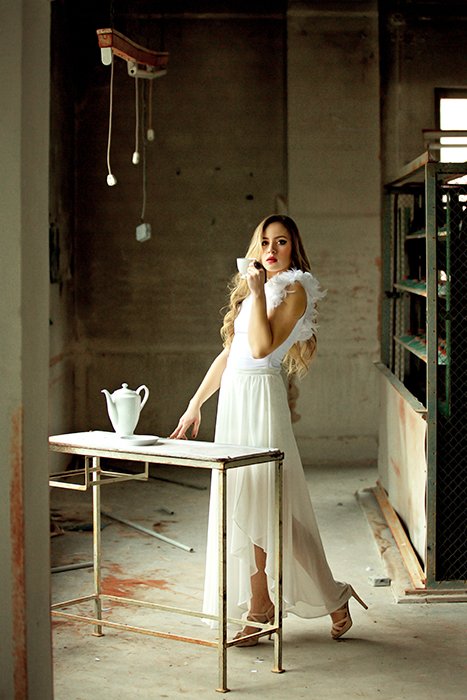
More often than not, fine art portraits have very simple backgrounds that put the spotlight on the subjects. Having a very simple background will highlight every feature on your subject’s face, like skin textures, clothes, and the objects they’re holding. Many fine art portraits have black backgrounds. This creates the illusion of depth and compels the eye to focus exclusively on the model. If dark backgrounds don’t appeal to you, use neutral colors instead. A very popular fine art photographer, Sue Bryce often uses beige or grey backdrops to complement her models’ features, clothes and poses.
2. Use Inanimate Objects
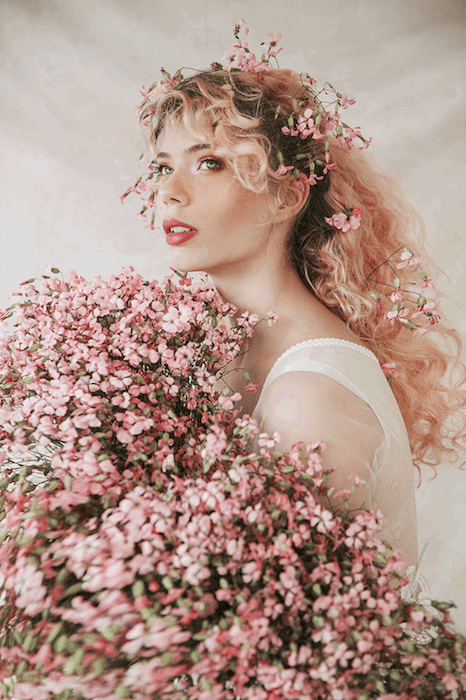
Old painting masters, like George William Joy and Fritz Zuber-Buhler, often added inanimate objects – flowers, bowls, and instruments – to their portraits. These items either told a story about their subjects or served as eye-catching decorations. We can learn a thing or two from these masters by using inanimate objects in our photographs. Things like books, flowers, and instruments all have textures that could turn your photos into true fine art portraits. As you look for objects, keep your model’s story in mind. Jovana Rikalo is an expert in sourcing the right props for a photoshoot. If you ever need inspiration, have a look at her series of portraits. Either way, keep an eye out for textures, details, shapes, and neutral colors. You can even analyze classical paintings (i.e., make an excuse to visit your local museum) for more ideas!
3. Try These Four Artistic Poses
Fine art portraits often feature models posing in an elegant but natural way. Below, you’ll find some poses that will complement your work and make your models feel confident.
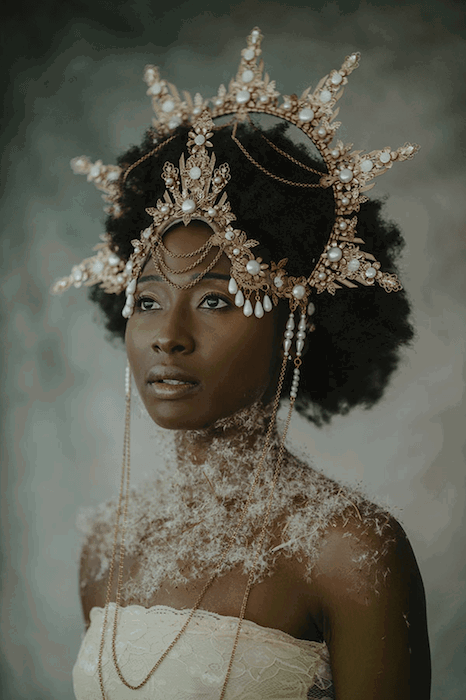
Drop the shoulders. Often used in fashion photography, this pose creates a relaxed but stylish look. Dropped shoulders will result in straight lines that naturally draw your viewers’ eyes to your subject. Create space between the limbs. Crossed arms and legs will make your subject look distant and uncomfortable. Instead of letting them pose stiffly in front of the camera, let them loosen up, dance around, or do some stretching exercises. Creating this physical space will make them look more elegant, give you more lines and curves to work with, and make your composition look more visually appealing. Use hands to tell a story. Ask the model to use her hands – not her face – to tell a story. Let her face blend into the black background, and leave room for props, flowers, and her body, most importantly, her hands. Fine art photography overflows with subtle details like these, so make sure you include them in your photographs. Tilt the head back. This is a pose that’s reminiscent of swans and ballerinas. A slight tilt will make your subject’s neck look longer, create more space around them, and give their body more shape. This will create the perfect subject for a fine art piece.
Make Your Models Feel Comfortable! Keep in mind that not every pose and expression will work for every model. What looks good on one person will look unflattering on someone else. To avoid unnecessary misunderstandings, get to know your model first. Before your photoshoot, have a quick meeting with your team. If they’re beginners, help them feel comfortable about their posing skills and find the ones that make them stand out. Introduce them to poses you like (visual references will help you a lot during this process) and ask for their honest feedback. Let it go if a pose looks forced (regardless of how popular it is).
4. Be Creative With Makeup and Costumes
Fine art photography is nothing without its costumes and makeup. Some photographers like to take the traditional route and dress their models using costumes that look like they belong to royalty. Many focus on both makeup and clothes. Artists like Jovana Rikalo use makeup and costume to tell stories in a single image or series of images. Make-up and costumes set the scene and allow the viewers’ minds to run wild, creating stories for the characters you present. You can use anything. I often use thrift store finds in my portraits. They’re unusual, affordable, and vibrant enough for fine art portraits. Be as creative as you want! Use secondhand scarves, hats, dresses, or even gloves. Pretend that you’re preparing for a film role. It sounds silly, but your imagination can take you to the most exciting places if you allow it to.
5. Don’t Be Afraid of Motion Blur
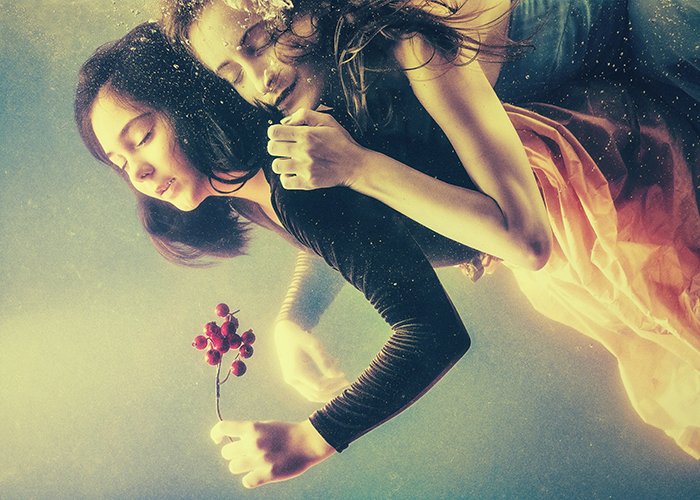
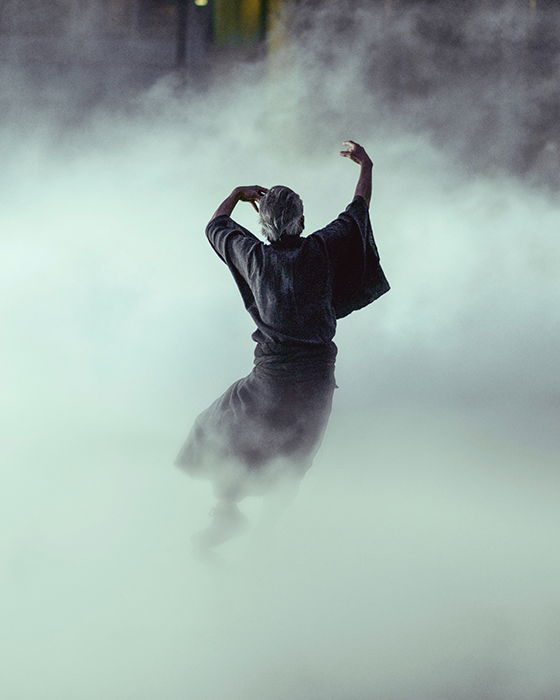
In general, motion blur is something many portrait photographers tend to avoid for understandable reasons. Details are something you don’t want to take for granted. However, you should occasionally blur parts of your photo during your shoot or post-production. The results will show you the importance of getting out of your comfort zone and experimenting with unpredictable techniques. Regardless of the aforementioned posing techniques, give your models the space and time to do whatever they want. This spontaneity may result in unexpectedly appealing portraits. For example, a subtle hand movement might make your photo look like an unfinished painting. Moving hair might look like a waterfall.
6. Go Faceless
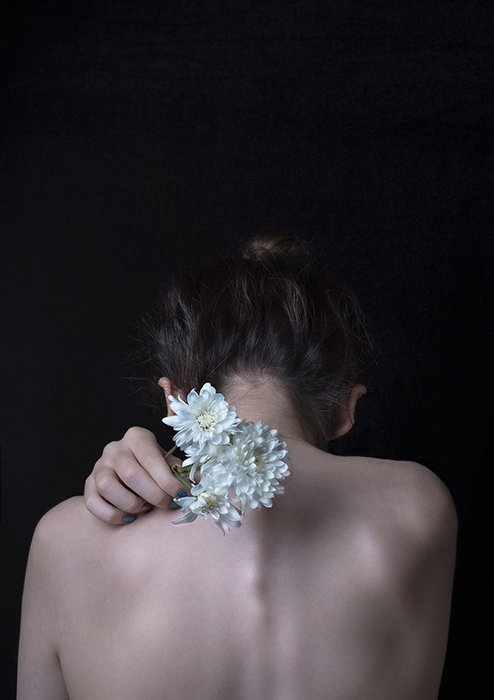
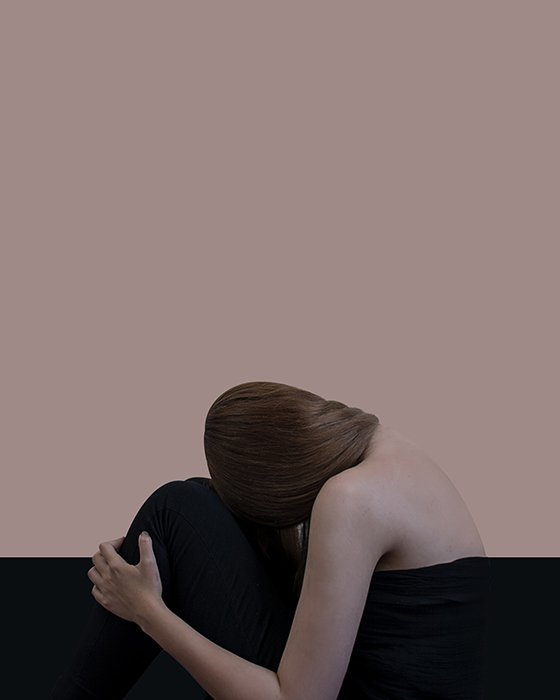
As important as facial expressions are, they don’t have to be featured in a portrait. Sometimes, a simple photo of a hand, a strand of hair, or a curved spine can evoke memories far more powerful than a photo of a stranger’s face. There’s something comforting, even relatable, about seeing a human figure and not just an unfamiliar face. Faceless fine art portraits are ideal for self-portraits, experimental photos, or test shots with subjects who don’t want to show their faces. Taking them will open up a whole new world for you. You’ll have nothing but movements, body parts, and backdrops to focus on. I love the faceless side of fine art because it is liberating. Your results will still be portraits but without the sharp eye focus, expression, or poses that you’re used to. This side of photography will enable you to think outside the box, give shape to ideas you never imagined you’d have, and improve your observation skills.
7. Give Yourself an Editing Challenge
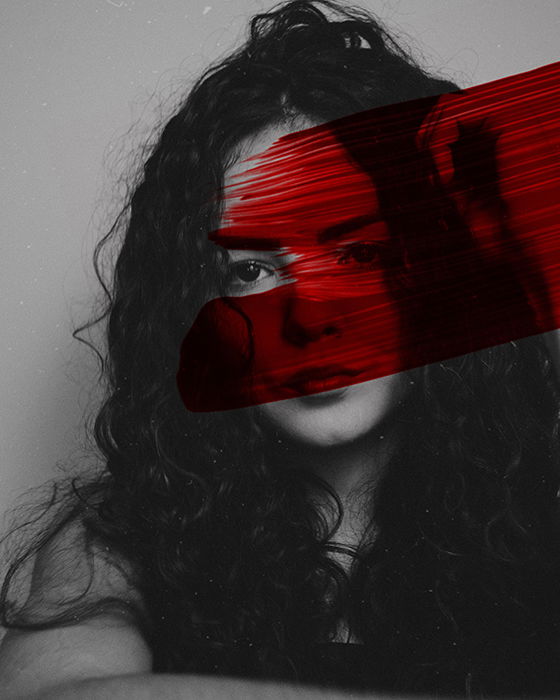
Editing and color correction can add a lot of extra depth to your portraits. Take fine art photographer Paul Apalkin, for instance. His portraits are striking, and his models look comfortable. What you may not notice immediately is how much love he pours into his editing work; his portraits are carefully color corrected to look the way they do. Without his editing skills, he wouldn’t have a powerful signature style. Editing is definitely optional. If you want to keep your photos as raw as possible, you can still create very stunning fine art portraits. If you’re in the mood to experiment, though, you’re in for a treat! Fine art portrait photographers use various textures, photo resources, and color-correcting tools to take their portraits to the next level. Challenge yourself by experimenting with different editing programs with different resources.
Conclusion
Fine art portrait photography is a genre that will force you to redefine your artistic skills. It will compel you to explore the beauty of people in various forms. It will teach you to not only capture life as it is but create worlds of your own. By letting your own ideas come to life, you’ll turn into a photographer with impressive skills and a strong vision. The true beauty of this genre can be found in its freedom to be anything it desires. Fine art photography has no boundaries or limits. It all depends on your comfort zone, ideas, and technical skills. Follow your instinct, experiment with the tips above, and remember, your finest fine art portrait is just around the corner. Capture joyful memories and charming portraits of your children at home with our Dreamy Childhood Portraits ebook!

title: “7 Tips To Create Your Own Fine Art Portrait Photography” ShowToc: true date: “2022-12-28” author: “Mark Hubbard”
It also has patterns that you can use to create your own fine art. Some of these include poses, expressions, and lighting that will add an elegant touch to your portraits. Before exploring these patterns, let’s understand what makes an outstanding portrait.
Fine Art Portrait Photography: How Portrait Photography Becomes Fine Art
In general, portraits feature at least one person whose face may or may not be shown. Your subject’s appearance can be concealed by makeup, shadows, or an object. Alternatively, their head can be turned or not even included in the frame. Some photographers remove parts of their subjects’ faces (in an editing program, of course!) to put a spotlight on a specific theme, strengthen their editing skills, or dip their toes into surreal portrait photography. There’s a thin, unclear line between portrait and fine art portrait photography. In my opinion, if you want to create a portrait in the fine art genre, you have every right to label it any way you like. If it’s something that could hang in an art gallery, it’s fine art. If you carefully planned your photoshoot and had a very specific concept in mind, your results are fine art. As you can see, there are no boundaries for this genre. There are, however, a few patterns that I’ve noticed in the most popular fine art portraits. Once you familiarise yourself with them, you’ll develop a fine art instinct that will help you find and create the most stunning portraits imaginable. As absurd as this sounds, it works!
Tips To Create Your Own Fine Art Portraits
1. Use Classic Backgrounds to Highlight the Subject
More often than not, fine art portraits have very simple backgrounds that put the spotlight on the subjects. Having a very simple background will highlight every feature on your subject’s face, like skin textures, clothes, and the objects they’re holding. Many fine art portraits have black backgrounds. This creates the illusion of depth and compels the eye to focus exclusively on the model. If dark backgrounds don’t appeal to you, use neutral colors instead. A very popular fine art photographer, Sue Bryce often uses beige or grey backdrops to complement her models’ features, clothes and poses.
2. Use Inanimate Objects
Old painting masters, like George William Joy and Fritz Zuber-Buhler, often added inanimate objects – flowers, bowls, and instruments – to their portraits. These items either told a story about their subjects or served as eye-catching decorations. We can learn a thing or two from these masters by using inanimate objects in our photographs. Things like books, flowers, and instruments all have textures that could turn your photos into true fine art portraits. As you look for objects, keep your model’s story in mind. Jovana Rikalo is an expert in sourcing the right props for a photoshoot. If you ever need inspiration, have a look at her series of portraits. Either way, keep an eye out for textures, details, shapes, and neutral colors. You can even analyze classical paintings (i.e., make an excuse to visit your local museum) for more ideas!
3. Try These Four Artistic Poses
Fine art portraits often feature models posing in an elegant but natural way. Below, you’ll find some poses that will complement your work and make your models feel confident.
Drop the shoulders. Often used in fashion photography, this pose creates a relaxed but stylish look. Dropped shoulders will result in straight lines that naturally draw your viewers’ eyes to your subject. Create space between the limbs. Crossed arms and legs will make your subject look distant and uncomfortable. Instead of letting them pose stiffly in front of the camera, let them loosen up, dance around, or do some stretching exercises. Creating this physical space will make them look more elegant, give you more lines and curves to work with, and make your composition look more visually appealing. Use hands to tell a story. Ask the model to use her hands – not her face – to tell a story. Let her face blend into the black background, and leave room for props, flowers, and her body, most importantly, her hands. Fine art photography overflows with subtle details like these, so make sure you include them in your photographs. Tilt the head back. This is a pose that’s reminiscent of swans and ballerinas. A slight tilt will make your subject’s neck look longer, create more space around them, and give their body more shape. This will create the perfect subject for a fine art piece.
Make Your Models Feel Comfortable! Keep in mind that not every pose and expression will work for every model. What looks good on one person will look unflattering on someone else. To avoid unnecessary misunderstandings, get to know your model first. Before your photoshoot, have a quick meeting with your team. If they’re beginners, help them feel comfortable about their posing skills and find the ones that make them stand out. Introduce them to poses you like (visual references will help you a lot during this process) and ask for their honest feedback. Let it go if a pose looks forced (regardless of how popular it is).
4. Be Creative With Makeup and Costumes
Fine art photography is nothing without its costumes and makeup. Some photographers like to take the traditional route and dress their models using costumes that look like they belong to royalty. Many focus on both makeup and clothes. Artists like Jovana Rikalo use makeup and costume to tell stories in a single image or series of images. Make-up and costumes set the scene and allow the viewers’ minds to run wild, creating stories for the characters you present. You can use anything. I often use thrift store finds in my portraits. They’re unusual, affordable, and vibrant enough for fine art portraits. Be as creative as you want! Use secondhand scarves, hats, dresses, or even gloves. Pretend that you’re preparing for a film role. It sounds silly, but your imagination can take you to the most exciting places if you allow it to.
5. Don’t Be Afraid of Motion Blur
In general, motion blur is something many portrait photographers tend to avoid for understandable reasons. Details are something you don’t want to take for granted. However, you should occasionally blur parts of your photo during your shoot or post-production. The results will show you the importance of getting out of your comfort zone and experimenting with unpredictable techniques. Regardless of the aforementioned posing techniques, give your models the space and time to do whatever they want. This spontaneity may result in unexpectedly appealing portraits. For example, a subtle hand movement might make your photo look like an unfinished painting. Moving hair might look like a waterfall.
6. Go Faceless
As important as facial expressions are, they don’t have to be featured in a portrait. Sometimes, a simple photo of a hand, a strand of hair, or a curved spine can evoke memories far more powerful than a photo of a stranger’s face. There’s something comforting, even relatable, about seeing a human figure and not just an unfamiliar face. Faceless fine art portraits are ideal for self-portraits, experimental photos, or test shots with subjects who don’t want to show their faces. Taking them will open up a whole new world for you. You’ll have nothing but movements, body parts, and backdrops to focus on. I love the faceless side of fine art because it is liberating. Your results will still be portraits but without the sharp eye focus, expression, or poses that you’re used to. This side of photography will enable you to think outside the box, give shape to ideas you never imagined you’d have, and improve your observation skills.
7. Give Yourself an Editing Challenge
Editing and color correction can add a lot of extra depth to your portraits. Take fine art photographer Paul Apalkin, for instance. His portraits are striking, and his models look comfortable. What you may not notice immediately is how much love he pours into his editing work; his portraits are carefully color corrected to look the way they do. Without his editing skills, he wouldn’t have a powerful signature style. Editing is definitely optional. If you want to keep your photos as raw as possible, you can still create very stunning fine art portraits. If you’re in the mood to experiment, though, you’re in for a treat! Fine art portrait photographers use various textures, photo resources, and color-correcting tools to take their portraits to the next level. Challenge yourself by experimenting with different editing programs with different resources.
Conclusion
Fine art portrait photography is a genre that will force you to redefine your artistic skills. It will compel you to explore the beauty of people in various forms. It will teach you to not only capture life as it is but create worlds of your own. By letting your own ideas come to life, you’ll turn into a photographer with impressive skills and a strong vision. The true beauty of this genre can be found in its freedom to be anything it desires. Fine art photography has no boundaries or limits. It all depends on your comfort zone, ideas, and technical skills. Follow your instinct, experiment with the tips above, and remember, your finest fine art portrait is just around the corner. Capture joyful memories and charming portraits of your children at home with our Dreamy Childhood Portraits ebook!


