15. Travel Photography Mistakes Resulting from Not Enough Planning
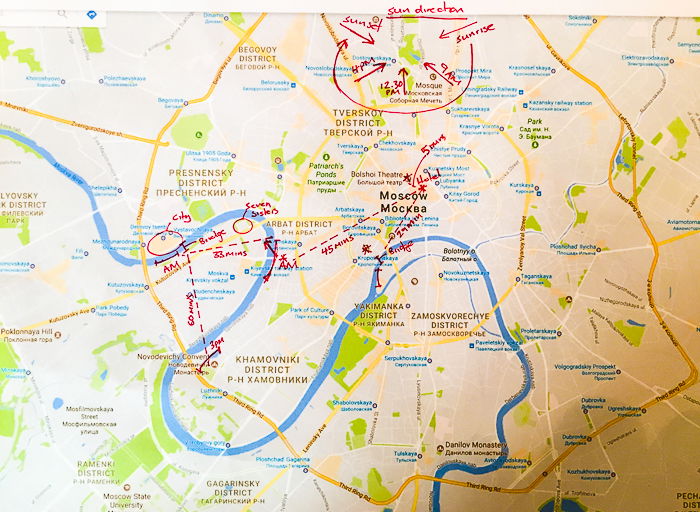
One of the biggest beginner photography mistakes for travel photography is not planning enough before you leave on a trip. Travel photography requires a lot of planning and research before you even set foot outside your home. Those amazing travel photos that you see in magazines and newspapers are often the result of a well-planned shoot. On any given trip, you will have very limited time. To make the most of it, you must know what you will be photographing and when. As soon as you have an idea of where you will be going, you should start your research and planning phase. Begin by looking at a map of the location to work out light direction, and sunrise and sunset times. Also look at potential distances between locations. You should also look at stock websites to get a sense of what already exists from that location. The more you know about a destination, the better your travel images are likely to be.
14. No Shot List
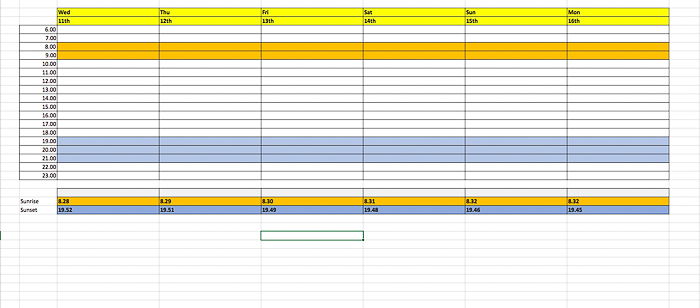
The purpose of research is putting together a detailed shot list. This will be your checklist to work through to make sure that you come back with a good variety of photos. Your shot list will vary depending on where you are going and any potential brief that you have to follow. For example, if you are photographing the Venice carnival, your shot list will differ to photographing Venice when there is no carnival. The way you set out your shot list will depend on how active you want to be. But also what you are photographing and where. In a big city, you will need to allow more time to travel around to different locations. Make sure you factor in opening and closing times of tourist sights as well. One of the best ways to set your shot list out is to break the day down into 4 time segments: morning (sunrise to around 11 am), lunchtime (11 am to 2 pm), afternoon (2 pm to sunset), and evening (after sunset). The hours might change depending on your destination and time of year. But breaking down the day can help you be more efficient with your time. Also, break down your shot list by location. Plan to cover places that are geographically close during each time segment. This will mean you won’t waste your time traveling rather than taking photos. A final shot list should show you exactly where you are going to be and when.
13. Not Enough Time
Creating a shot list is important because it will make you think about what you are going to be photographing. This, in turn, makes you try to envision how and when you will take that photo. By envisioning the photo, you will be more aware if you’re packing too much into a short time frame. Whilst it’s important to try and cover as many items on your shot list as possible, you also need to allow yourself enough time to capture them well. Rushing around trying to capture everything will mean you won’t photograph anything well. This is often one of the biggest beginner photography mistakes I come across. So make sure you always allow extra time for any item on your shot list.
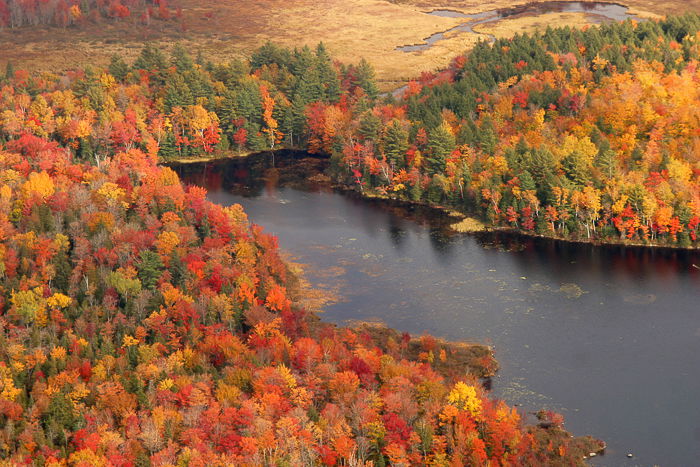
12. Not the Right Time
One of the best bits of advice that was given to me when I was starting out was that “there is a perfect time to photograph everything”. That “perfect time” could be a certain time of day, certain conditions or even certain times of the year. Your ultimate goal should always be to photograph everything at the perfect time. That rarely happens in reality though. Even so, understanding light and how it can impact your travel images can help you plan your shoots to maximise the conditions that you have. A lot of this will be down to planning. Making sure that you are traveling at the right time will give you the best chance to capture the photos that you want. But you also need to be able to adapt whilst on a shoot. If it’s overcast with a blanket of white clouds, it would be pointless trying to capture stunning cityscapes. Instead, focus on photographing people or food where the muted light will be beneficial to the photo as it won’t give harsh shadows. Always aim to capture travel images that work best for the time and conditions you are taking photos in. If you do, you will immediately see an improvement in results.
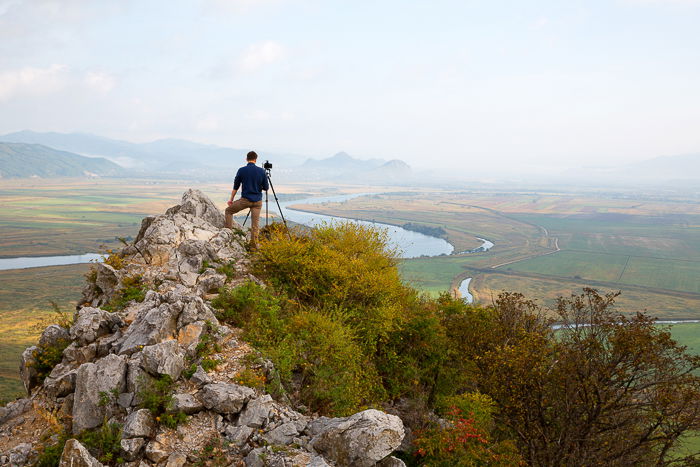
11. Packing Too Much Gear
Travel photography often involves being out and about all day. On any given day whilst on a shoot, I will walk anywhere between 15 – 30 km. The last thing any travel photographer wants to do is carry around 20 kilos of equipment. Especially when you will not use some of it at all. People are usually astonished at how little I carry with me each day. My basic equipment on any given trip involves a couple of lenses (24-70mm and 70-200mm). A spare DSLR camera and some filters (polarizing filter, ND and graduated ND filters). A tripod that I only take with me when I know I’ll use it. A flash and a load of memory cards and batteries. If I need other specific equipment (a macro lens, for example), I will add that to the things I take. But for the vast majority of my shoots, this is all I take with me. Carrying equipment that you won’t need will sap your energy, which can mean you are less inclined to push yourself when tired. Who would want to walk up that long flight of stairs with a pack that weighs 25 kilograms? Always aim to head out with as little as you think you will need and avoid carrying equipment for the sake of it. We have a good post on travel packing hacks if you need some tips!
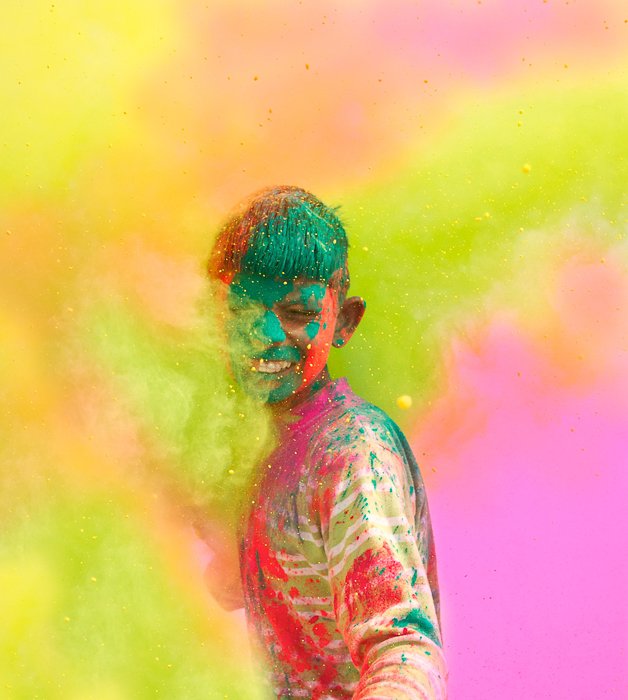
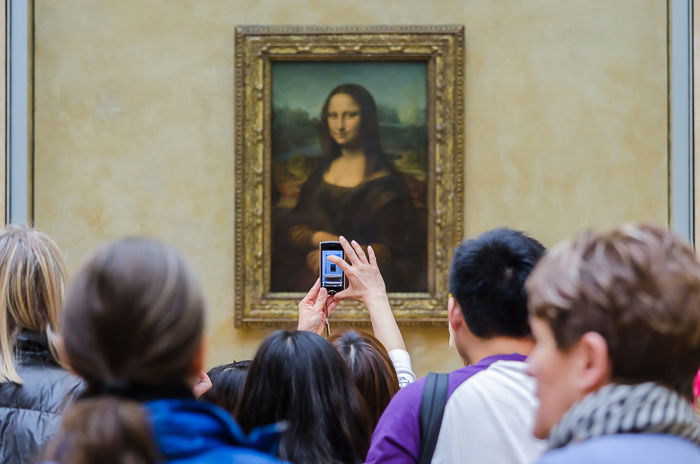
10. Too Shy
One of the biggest reasons why beginner travel photographers don’t capture great travel images is shyness. It could be shyness in approaching and photographing people, places, or even objects. It is always fascinating watching people take out their smartphones and snap away without a care in the world. Give some of those people a digital camera and they suddenly develop a fear that people will challenge them about taking their photo. Most people will be flattered that you want to take their photographs. But even if they don’t want you to take their photo, what is actually the worst thing that could happen? If you ask them, they may refuse. If you don’t ask, they might turn away or put their hands in front of their face. Does that seem that bad? As long as you use common sense you should not have any issues. For example, it isn’t advisable to photograph military personnel without asking. Or you shouldn’t take photos in places where photography is not allowed, like museums. In some cultures, some people may not want to be photographed because of religious beliefs. But in all my years of working as a travel photographer, I have never encountered any problems. To capture great travel images you need to overcome any shyness you may have. You need to be willing to approach and photograph anyone or any situation that will enhance your collection of that destination.
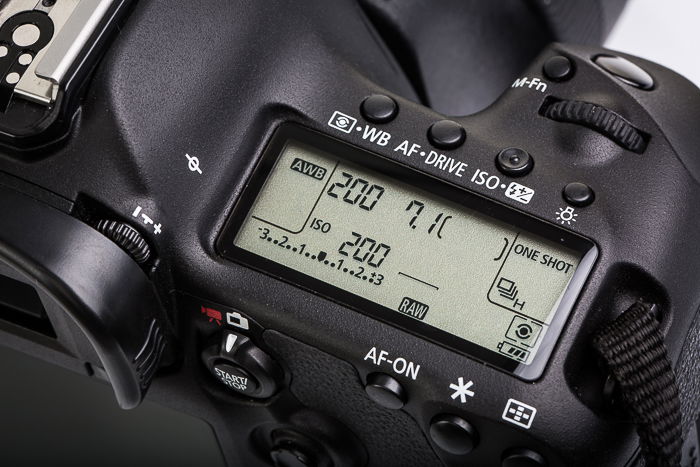
9. Not Knowing Your Camera Well Enough
One of the reasons that travel photographs have such an impact on the viewer is that they often capture fleeting moments that the average tourist would otherwise miss. But these moments don’t last longer than a few seconds. Unless you know your camera completely and can switch settings in an instant, you might miss them. This is one of the biggest beginner photography mistakes but also one of the easiest to remedy. The only way to get to a point where the camera becomes an extension of your arm is to practice. The more you take pictures, the better and quicker you will be at evaluating the scenario and changing settings. You need to aim to get efficient enough that you subconsciously change and tweak settings in seconds. Only then will you capture those fleeting moments.
8. Not Ready
Another common travel photography mistake is not being ready. Even if you know your camera well, it is not going to make any difference if it is in your bag when a photo opportunity presents itself. As a travel photographer, you should always be ready to capture photos. That means having your camera out of your bag and switched on, with the lens cap off. You should also have enough spare batteries and memory cards that you are never in danger of running out. A good habit to get into is to tweak your settings for the location or situation you are likely to encounter. For example, if you are taking photographs in the street in bright sunshine and then walk into a covered market, you will likely need to change your settings to combat the low light conditions. By changing the settings straightaway, you will be ready if a photo opportunity presents itself.
7. No Patience
It is very rare to arrive at a spot and have everything already in place for that perfect photo. Most great travel images are the result of careful planning and patience by the photographer. It could be that you arrive at a location and find that you have the perfect light but you are missing a point of interest (i.e. a person in the photo). So you can either “settle” for that photo or wait for someone to come into your shot. Taking a bit more time when taking a photo will also mean that you are more likely to evaluate the scene. This should make you think more carefully about how to frame your shot. It should also help you experiment with different settings and locations. The only way to ensure that you capture stunning travel photos is to allow yourself enough time in your shot list to be able to wait for the “perfect” photo. You are far better off capturing 10 stunning photos than a hundred mediocre ones.
6. Not Willing to Persevere
Sometimes travel photography can be the most frustrating genre of photography. You may spend hours getting to a location only to find that the light isn’t right or that “point of interest” you waited for never materialised. Would you be willing to go through that again tomorrow to capture the photo? Unfortunately, as a travel photographer, you have no choice. If time permits, you have to be willing go back to a location again and again until you capture the shot you want.
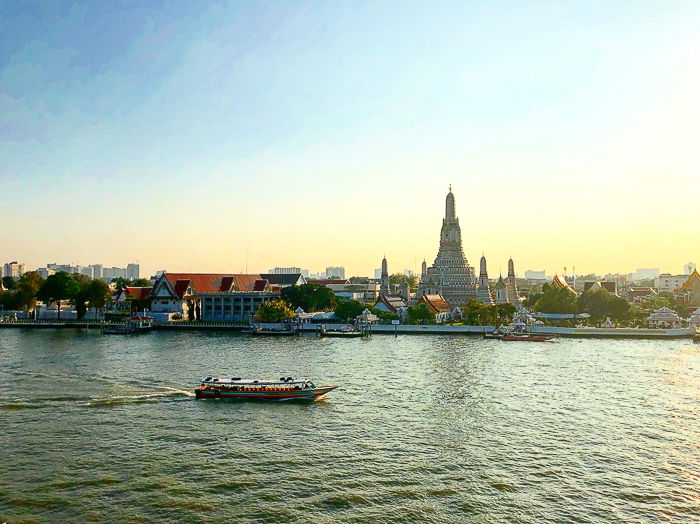
5. The Obvious Travel Photos
One of the downsides of modern-day digital photography is that you are competing with pretty much everyone. Even if someone only uses their smartphone, they are still competing with you. This means that most places, objects, and especially tourist sights have been photographed millions of times. Go to any stock website and type in Eiffel Tower and you will get thousands of results. Unfortunately, the normal tourist shot of famous locations isn’t enough anymore. Today, to stand out from the crowd, you need to try and push your creativity beyond the usual. This could be anything from unusual angles to capturing a photo with striking light. This doesn’t mean you should not take the usual tourist type shots. Only that you should always be thinking about how you can capture something more innovative. A great way to prepare for any trip is to research every item on your shot list by looking at stock photo websites. This can help you see what already exists, what works, and what doesn’t. Not only will this help inspire you but it might also give you ideas about how to capture something in a unique way.
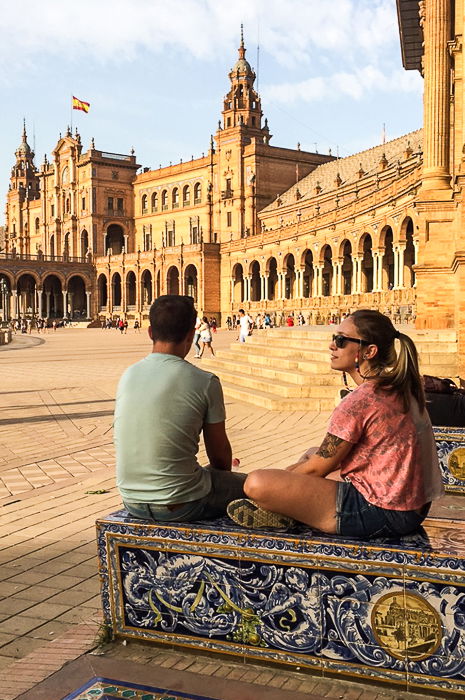
4. Not Telling a Story With Your Travel Images
These days I get asked more and more by photo editors to provide photos that tell a story or show an experience rather than standard post-card type shots. Of course, that story will differ depending on the article request. But even when I am photographing stock material, I will always try to cover a variety of stories and experiences. For example, rather than a standard shot of the Eiffel Tower, I aim to capture travel images that show a couple taking a selfie in the vicinity. Or an early morning jogger, someone enjoying a book or a child eating an ice cream and so on. Whilst they would still be in the vicinity of the sight and usually feature it in some form in the frame, these photos tell a much more intriguing story. The great thing about travel photography is that you are always presented with these situations. As long as you have done your research and are patient and train yourself to see them, you will be able to capture various stories and experiences from the same location.
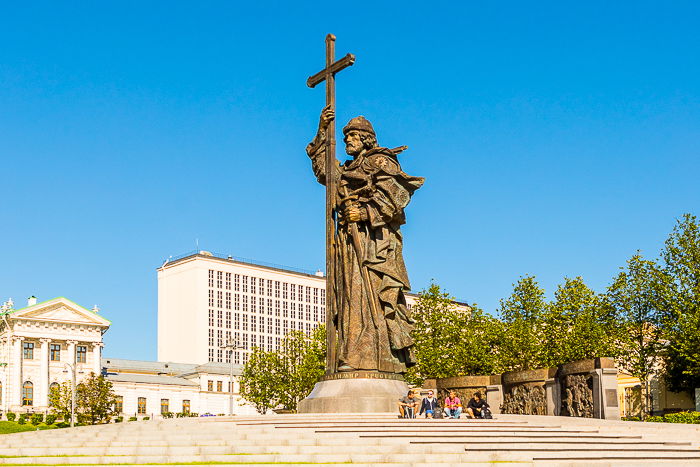
3. No Sense of Scale
How often have you been stunned by the sheer size of a huge tree, boulder, building or even statue? But when you look at your photo, that scale doesn’t come across. The reason for this is that digital cameras are still no match for the human eye. It’s difficult for someone looking at an image to distinguish size without a reference point. You need to provide them with a point of comparison to try and replicate that feeling of scale. For example, put a person next to that tall statue and that feeling of scale comes across straight away. This is because the viewer can then process that information with something they know and recognize the size of – in this instance a person. It can work with anything that people generally know the size of, like cars, houses, or even wildlife.
2. Traveling With Companions
This is one of the biggest challenges when you start out with travel photography. Most people have to combine their photography trips with family trips. That usually means traveling with a loved one or even kids. Unless your partner is interested in photography, they are not going to want to hang around for a few hours waiting for sunset with you. This usually means rushing things or even settling for whatever photo you can capture when you first get to a location. This is the main reason why most travel photographers work and travel alone. I very rarely find that the first photo I take at a location is one that I would send to clients. If you are traveling with companions it’s best to try and agree on specific times for your photography. That might be a day here and there or even a few hours each day. A great time for this is early morning. Your travel companions are most likely still asleep so you can head out for a few hours and be back by the time they wake up. But believe it or not, there is a benefit to traveling with people you know (if they are accommodating). Having a travel companion means you might have a willing model that you can use in your photos. By getting them involved, you may find that they are a little more patient and allow you to spend more time photographing.
1. Treating the Trip Like a Holiday
One of the earliest lessons I learnt from my trips was that there is a huge difference between “taking photos whilst travelling” and “traveling to take photos”. As a travel photographer, your only purpose on any trip is to capture stunning travel photos. Nothing should get in the way of that including being hungry, tired or bored. Travel photography means you will be waking up in the early hours of the morning. Then you’ll spend the day walking for hours on end and usually not getting to bed till late at night. There is usually no time for long leisurely lunches, relaxing on a sunbed, or partying till the early hours. Even if you are trying to combine photography and a holiday, which is understandable when you are starting out, try to set yourself a specific time dedicated to photography. Even if it is just one day on your trip, you will find that you will get more done and capture better images. It also means that you can still enjoy the rest of your trip.
Conclusion: Street Photography Quotes
Like everything, becoming a great travel photographer takes time and practice. You have to always improve your skills both technically and creatively. You need to work hard whilst on a trip, get by on little sleep and overcome any shyness that you may have. Needless to say that a love for traveling and exploring new places is also a must. But above all of these attributes, you have to be willing to persevere and be confident in your ability. The great thing about travel photography is that you will always have the opportunity to capture great moments. By avoiding these 15 common travel photography mistakes, you’ll be on your way to capturing great travel photos. For more great travel photography tips, check our post on best post processing tips for perfect travel pictures!