If you’re experimenting with different styles of editing but aren’t sure where to start, read on. We have a list of the most popular 10 photo editing styles.
10. Different Photo Editing Styles for Clean Editing
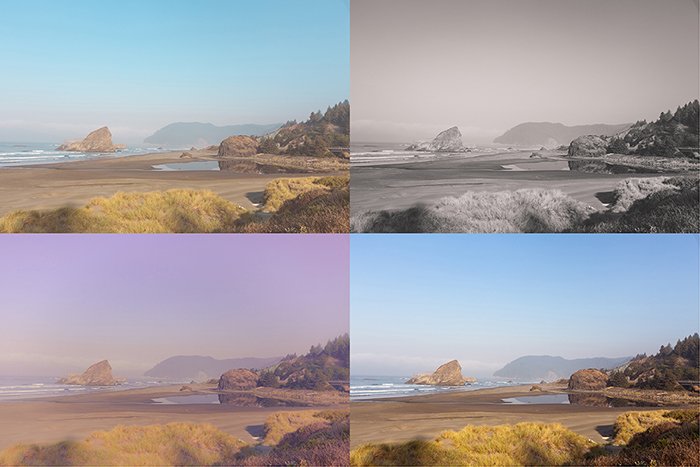
The most basic of editing styles, a clean edit means that you’re adjusting just the basics to clean up the image. This includes things like sharpness, color temperature, and clarity. The idea of the clean edit is to make the photo look as natural as possible as if you’ve done no edits to it at all! The clean edit look is a classic. If you’re looking for a style that will stand the test of time, clean image editing is a great option.
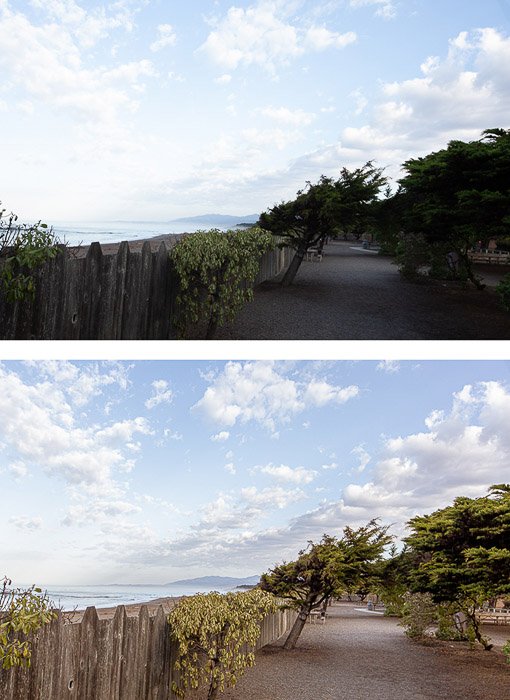
9. Matte Finish
Matte photo editing became quite trendy for some time and remains to be a popular editing style. The aim is a slightly washed out, dark and moody, vintage look. The ideal way to get this look is by adjusting the curves in Lightroom. You can find them in the Develop Module. You can still get quite a bit of variation within matte finish photos. This is another versatile option for all sorts of photography genres. A matte finish editing style is often used for landscapes, casual portraits, or street photography.
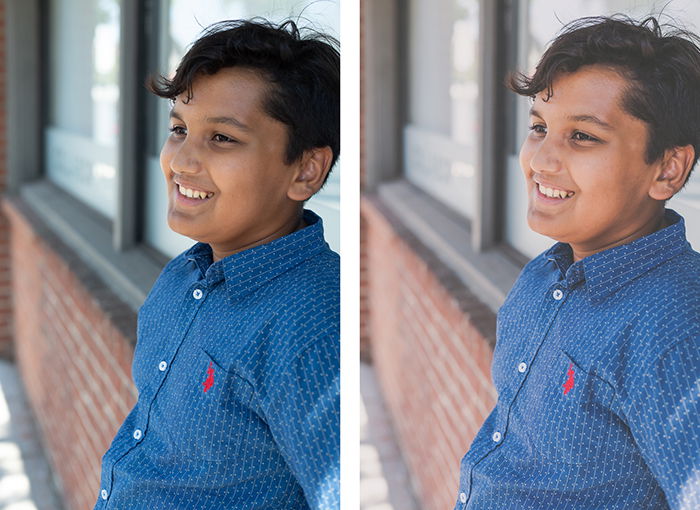
8. High Contrast
One way to create edgy and dramatic looks is to create a high contrast look with your photo editing. Whether color or black and white, a strong contrast is a way to make a photo more graphic with its dark shadows. When creating a strongly contrasted photo, be sure to adjust more than just the contrast! If the photo is color, then you’ll most likely want the colors to be a bit more saturated and vibrant. Darkening your blacks and brightening your whites also helps in this image editing style.
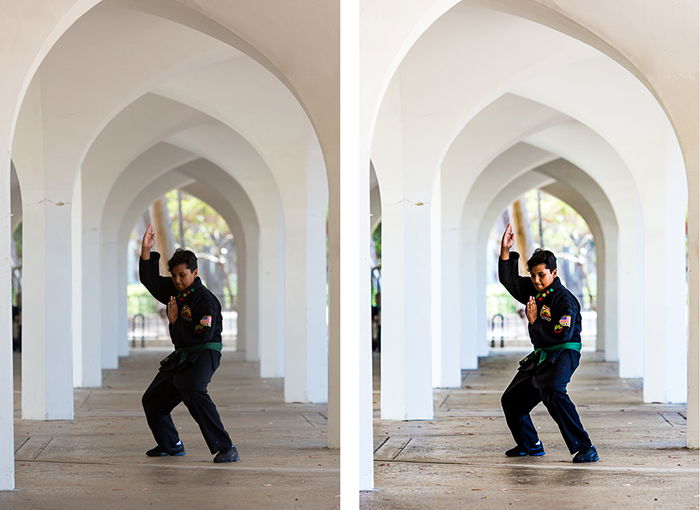
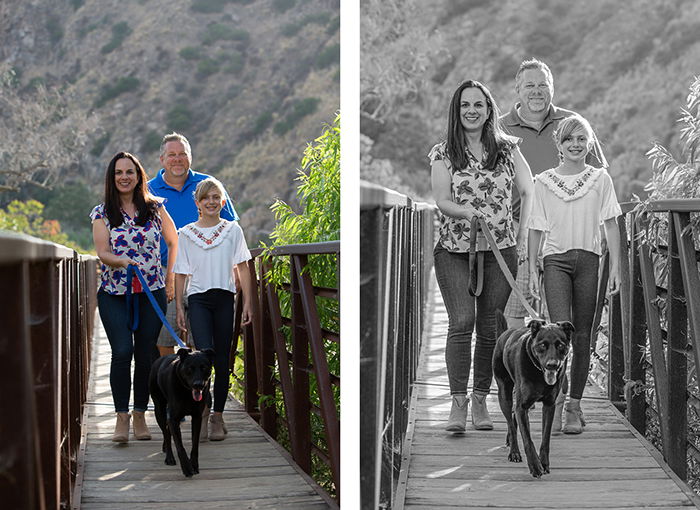
7. Mid-Contrast Black and White
If you’re just starting to dabble in black and white photography, this may be a great starting point for you! Going monotone can instantly add a bit of interest to an otherwise blah photo. Be sure to adjust the contrast, clarity, blacks, and whites so that you have a medium level of contrast. Too little contrast and the photo will lose its impact or power. Too much contrast and the photo becomes too harsh. This limits the usability with some genres. A clean and classic mid-contrast black and white editing style works very well with portraits, event, and wedding photography.
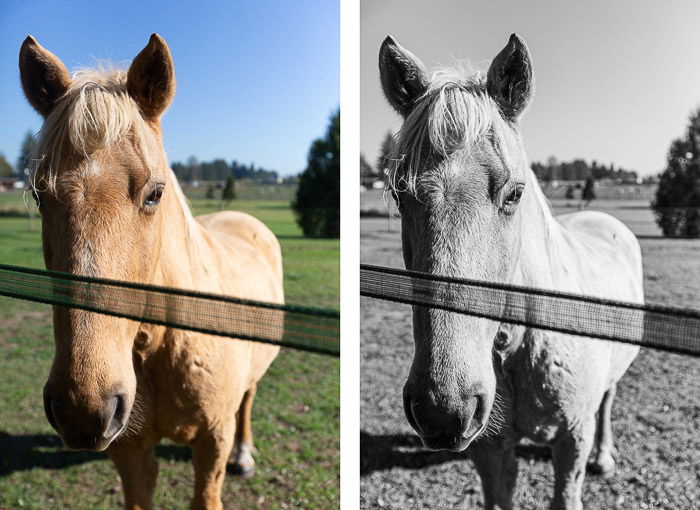
6. Warm Black and White
Black and white images are classic, but there can still be some variation in black and white images, too! A warm black and white photo edit typically has slightly lower contrast, a warm tone to the image that is very subtle, and highlight toned down while shadows are slightly brightened. The idea is to create a soft, warm look. Black and white photos of any kind are timeless, but a warm look adds a touch of casualness to them. Consider this image editing style for casual portraits, landscapes, and any type of detail photos.
5. HDR
HDR stands for High Dynamic Range. This basically just means that there’s a long-range between shadows and highlights. If you’re creating an HDR look in editing, this starts with brightening the shadows and lowering the highlights. When brightening shadows, be sure to also adjust the noise. You can do this in the Detail section in Lightroom’s Develop module. Otherwise, you’ll risk having a great deal of visual noise. The HDR editing style can be ideal for landscapes and architectural photography.
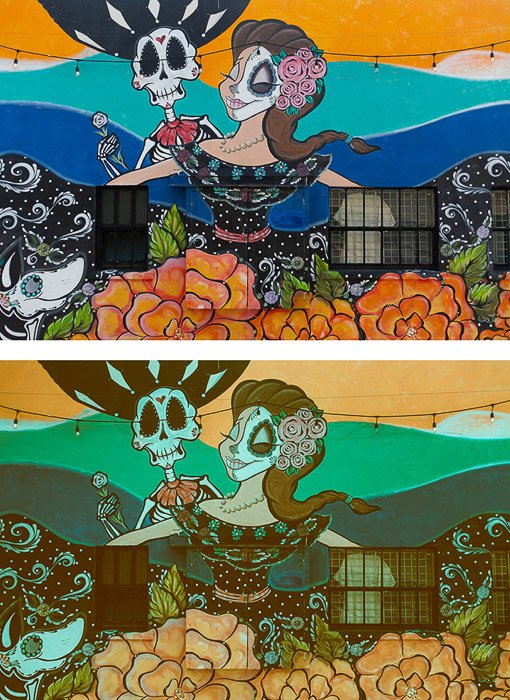
4. Cross-Processed
If you love experimenting with color, try editing your digital photos to replicate cross-processing! Cross-processed looks refer to the days of film. Back then photographers would develop film in chemicals meant for different film types. This deliberate change in the chemicals would create funky colors that people loved! With digital processing, though, photographers can use the Split Tone section in Lightroom’s Develop module to create similar looks. This look can be fun to use for just about any type of image. It is often seen on portraits, urban or natural landscapes, or still life photos.
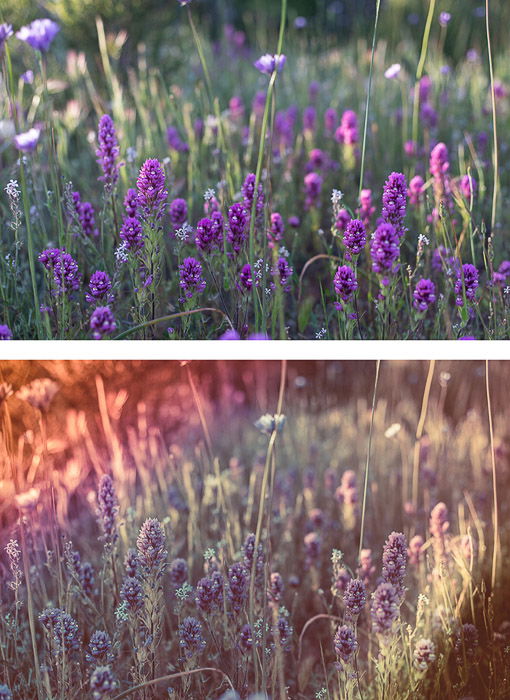
3. Damaged Film Look
If you’re looking to go even farther with a funky and colorful look, create a damaged film look! This photography editing style again goes back to the days of film. It was often seen when the film was expired or had some sort of heat or light damage to it. The results are unreliable. They typically show as colorful streaks mixed in with scratches. The look of damaged film lends itself perfectly to grungy photos of urban settings. It can also be fun to incorporate even into portraits!
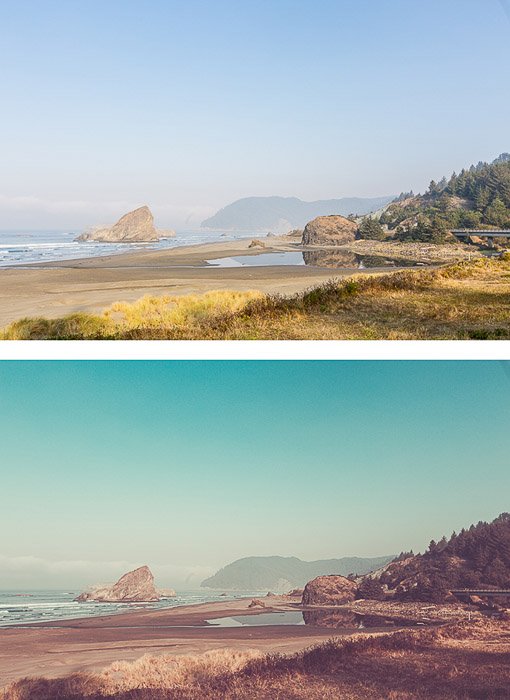
2. Vintage Film
The vintage film look is one that draws from a few other editing styles to mimic film from the 1970s and 1980s. Some vintage film looks may incorporate a slightly matte finish. They may have a heavier grain, and colors may be slightly washed out. A vintage film photography editing style is intended to draw on our sense of nostalgia. It’s ideal for casual portraits and outdoor photos. For even more of a vintage look, experiment with rounded corners or adding the white border of a Polaroid photo!
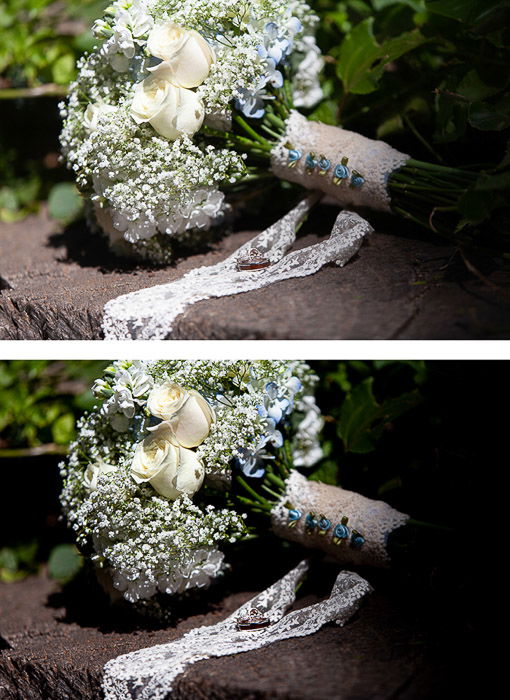
1. Dark and Moody
We see a lot of bright, white, cheerful photos these days, but what about a moodier alternative? A dark and moody photography editing style can be wonderful for evoking emotion. Shadows are dark and heavy, so our eyes get drawn to the highlights. Our “white space” is the darkness, rather than the lightness. The highlights and colors are so important in this editing style. It’s got more of a graphic approach to composition. Think of creating a sense of stillness and emotion with powerful compositions. The dark and moody photography editing style is ideal for still life photography, some types of portraiture, and detail photos of just about any scene.
Conclusion
Whatever becomes your signature photo editing style will most likely be a combination of several of the above editing styles. The idea, though, is to use the list above as a kick start for experimenting so that you can find what suits you best. And who knows? Maybe every few months or so you’ll come back to this list to experiment some more! We have a great article on finding your wedding photography style to check out next!
title: “10 Different Photo Editing Styles You Should Try Yourself” ShowToc: true date: “2022-12-29” author: “Zachary Smith”
If you’re experimenting with different styles of editing but aren’t sure where to start, read on. We have a list of the most popular 10 photo editing styles.
10. Different Photo Editing Styles for Clean Editing
The most basic of editing styles, a clean edit means that you’re adjusting just the basics to clean up the image. This includes things like sharpness, color temperature, and clarity. The idea of the clean edit is to make the photo look as natural as possible as if you’ve done no edits to it at all! The clean edit look is a classic. If you’re looking for a style that will stand the test of time, clean image editing is a great option.
9. Matte Finish
Matte photo editing became quite trendy for some time and remains to be a popular editing style. The aim is a slightly washed out, dark and moody, vintage look. The ideal way to get this look is by adjusting the curves in Lightroom. You can find them in the Develop Module. You can still get quite a bit of variation within matte finish photos. This is another versatile option for all sorts of photography genres. A matte finish editing style is often used for landscapes, casual portraits, or street photography.
8. High Contrast
One way to create edgy and dramatic looks is to create a high contrast look with your photo editing. Whether color or black and white, a strong contrast is a way to make a photo more graphic with its dark shadows. When creating a strongly contrasted photo, be sure to adjust more than just the contrast! If the photo is color, then you’ll most likely want the colors to be a bit more saturated and vibrant. Darkening your blacks and brightening your whites also helps in this image editing style.
7. Mid-Contrast Black and White
If you’re just starting to dabble in black and white photography, this may be a great starting point for you! Going monotone can instantly add a bit of interest to an otherwise blah photo. Be sure to adjust the contrast, clarity, blacks, and whites so that you have a medium level of contrast. Too little contrast and the photo will lose its impact or power. Too much contrast and the photo becomes too harsh. This limits the usability with some genres. A clean and classic mid-contrast black and white editing style works very well with portraits, event, and wedding photography.
6. Warm Black and White
Black and white images are classic, but there can still be some variation in black and white images, too! A warm black and white photo edit typically has slightly lower contrast, a warm tone to the image that is very subtle, and highlight toned down while shadows are slightly brightened. The idea is to create a soft, warm look. Black and white photos of any kind are timeless, but a warm look adds a touch of casualness to them. Consider this image editing style for casual portraits, landscapes, and any type of detail photos.
5. HDR
HDR stands for High Dynamic Range. This basically just means that there’s a long-range between shadows and highlights. If you’re creating an HDR look in editing, this starts with brightening the shadows and lowering the highlights. When brightening shadows, be sure to also adjust the noise. You can do this in the Detail section in Lightroom’s Develop module. Otherwise, you’ll risk having a great deal of visual noise. The HDR editing style can be ideal for landscapes and architectural photography.
4. Cross-Processed
If you love experimenting with color, try editing your digital photos to replicate cross-processing! Cross-processed looks refer to the days of film. Back then photographers would develop film in chemicals meant for different film types. This deliberate change in the chemicals would create funky colors that people loved! With digital processing, though, photographers can use the Split Tone section in Lightroom’s Develop module to create similar looks. This look can be fun to use for just about any type of image. It is often seen on portraits, urban or natural landscapes, or still life photos.
3. Damaged Film Look
If you’re looking to go even farther with a funky and colorful look, create a damaged film look! This photography editing style again goes back to the days of film. It was often seen when the film was expired or had some sort of heat or light damage to it. The results are unreliable. They typically show as colorful streaks mixed in with scratches. The look of damaged film lends itself perfectly to grungy photos of urban settings. It can also be fun to incorporate even into portraits!
2. Vintage Film
The vintage film look is one that draws from a few other editing styles to mimic film from the 1970s and 1980s. Some vintage film looks may incorporate a slightly matte finish. They may have a heavier grain, and colors may be slightly washed out. A vintage film photography editing style is intended to draw on our sense of nostalgia. It’s ideal for casual portraits and outdoor photos. For even more of a vintage look, experiment with rounded corners or adding the white border of a Polaroid photo!
1. Dark and Moody
We see a lot of bright, white, cheerful photos these days, but what about a moodier alternative? A dark and moody photography editing style can be wonderful for evoking emotion. Shadows are dark and heavy, so our eyes get drawn to the highlights. Our “white space” is the darkness, rather than the lightness. The highlights and colors are so important in this editing style. It’s got more of a graphic approach to composition. Think of creating a sense of stillness and emotion with powerful compositions. The dark and moody photography editing style is ideal for still life photography, some types of portraiture, and detail photos of just about any scene.
Conclusion
Whatever becomes your signature photo editing style will most likely be a combination of several of the above editing styles. The idea, though, is to use the list above as a kick start for experimenting so that you can find what suits you best. And who knows? Maybe every few months or so you’ll come back to this list to experiment some more! We have a great article on finding your wedding photography style to check out next!
